Client Branding
Overview
Fisher Portal allows each organisation to customise the portal’s appearance with their own branding. As a client admin, you can set your organisation’s brand colour, upload your logo, choose a font, and add custom CSS — ensuring that the portal reflects your company identity when staff log in.
Branding changes apply to your organisation only. Other organisations on the platform are not affected.
Step-by-Step Guide
Step 1: Access Branding Settings
Navigate to Branding from the sidebar menu (or look for “Client Branding” under your organisation’s settings). The branding settings page shows your current configuration and a form to make changes.

Step 2: Set Your Brand Colour
- Locate the Primary Colour field on the branding form.
- Click the colour picker or enter a hex colour code (e.g.
#1B4F72for a navy blue,#C0392Bfor a deep red). - The primary colour is used for:
- Primary action buttons throughout the portal.
- Navigation highlights and active states.
- Links and interactive elements.
- Accent borders and indicators.
- Optionally, set a Secondary Colour and Accent Colour for additional visual customisation.
The portal automatically generates hover states and focus rings from your brand colour, so you only need to choose the base colour.
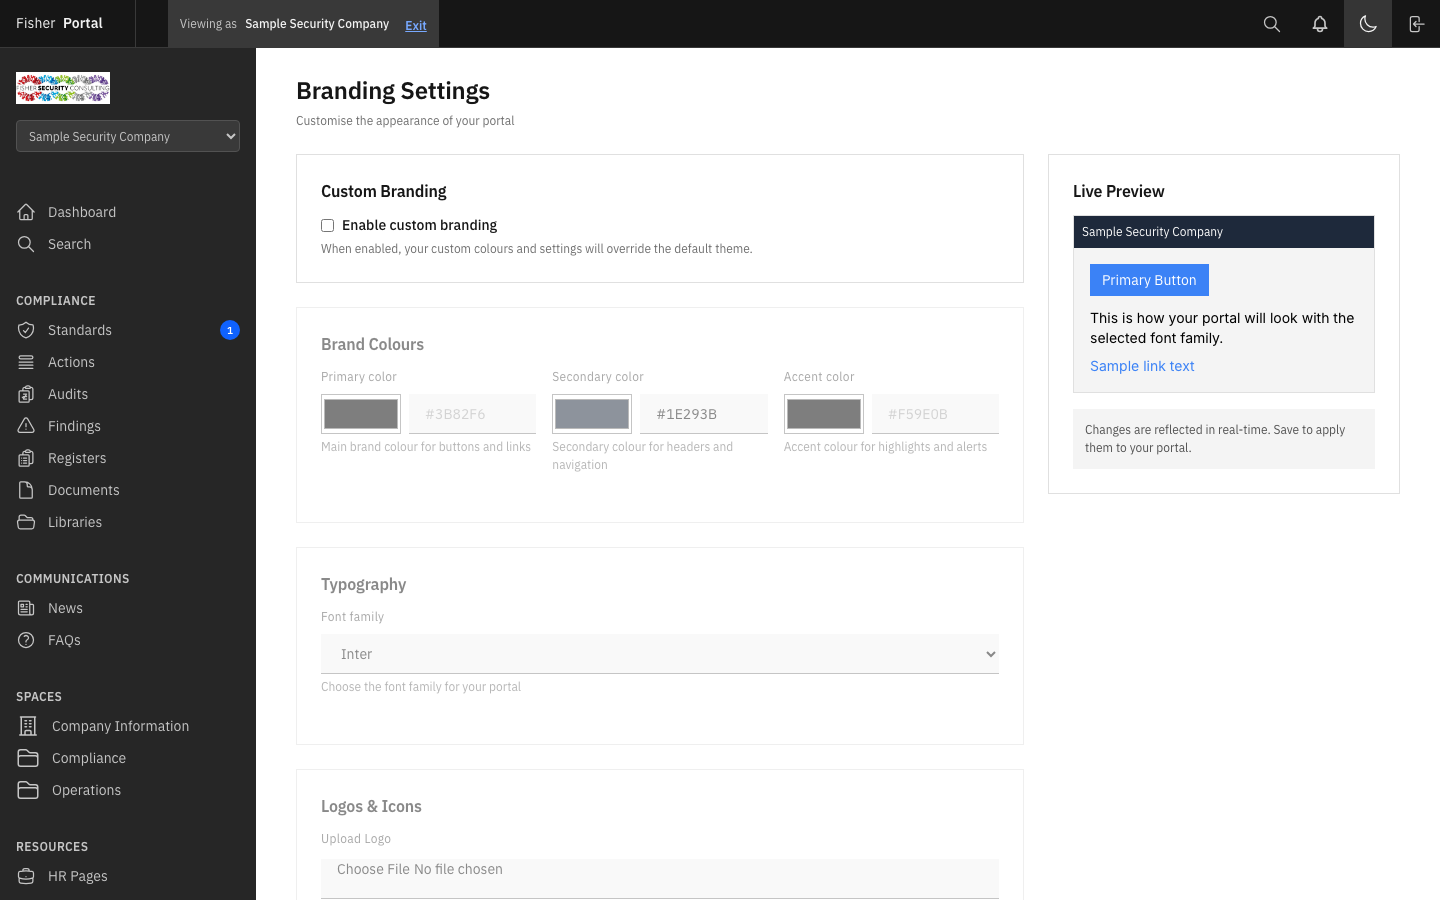
Step 3: Upload Your Logo
- Locate the Logo field on the branding form.
- Click to select or drag-and-drop your organisation’s logo file.
- Supported formats include PNG, JPEG, SVG, and WebP.
- The logo will appear in the portal’s header area when your staff log in.
- For best results, use a logo with a transparent background (PNG or SVG) that is at least 200px wide.
You can also set additional logo locations:
- Header Logo URL — A URL to an externally hosted logo for the header.
- Favicon URL — A URL to a custom favicon (the small icon shown in browser tabs).
Step 4: Choose a Font
- Locate the Font Family field on the branding form.
- Enter the name of the font you want to use (e.g. “Inter”, “Roboto”, “Open Sans”).
- The font must be a web-safe font or available via Google Fonts. The portal defaults to “Inter, system-ui” if no custom font is specified.
- This setting affects all body text and headings throughout the portal.
Step 5: Add Custom CSS
For advanced customisation beyond colours and fonts:
- Locate the Custom CSS field on the branding form.
- Enter any valid CSS rules to override the portal’s default styles.
- Custom CSS is injected after the portal’s standard styles, so your rules take precedence.
- Common uses include:
- Adjusting spacing or sizing for specific elements.
- Hiding elements that are not relevant to your organisation.
- Adding custom backgrounds or borders.
Example custom CSS:
/* Adjust the sidebar background */.sidebar {  background-color: #f8f9fa;}
/* Add a border under the header */.header {  border-bottom: 2px solid #1B4F72;}
Step 6: Enable or Disable Custom Branding
- Locate the Enable Custom Branding toggle on the form.
- When enabled, your brand colour, logo, font, and custom CSS are applied.
- When disabled, the portal reverts to the default Fisher Portal styling.
- This toggle is useful for quickly switching between branded and default appearances without deleting your settings.
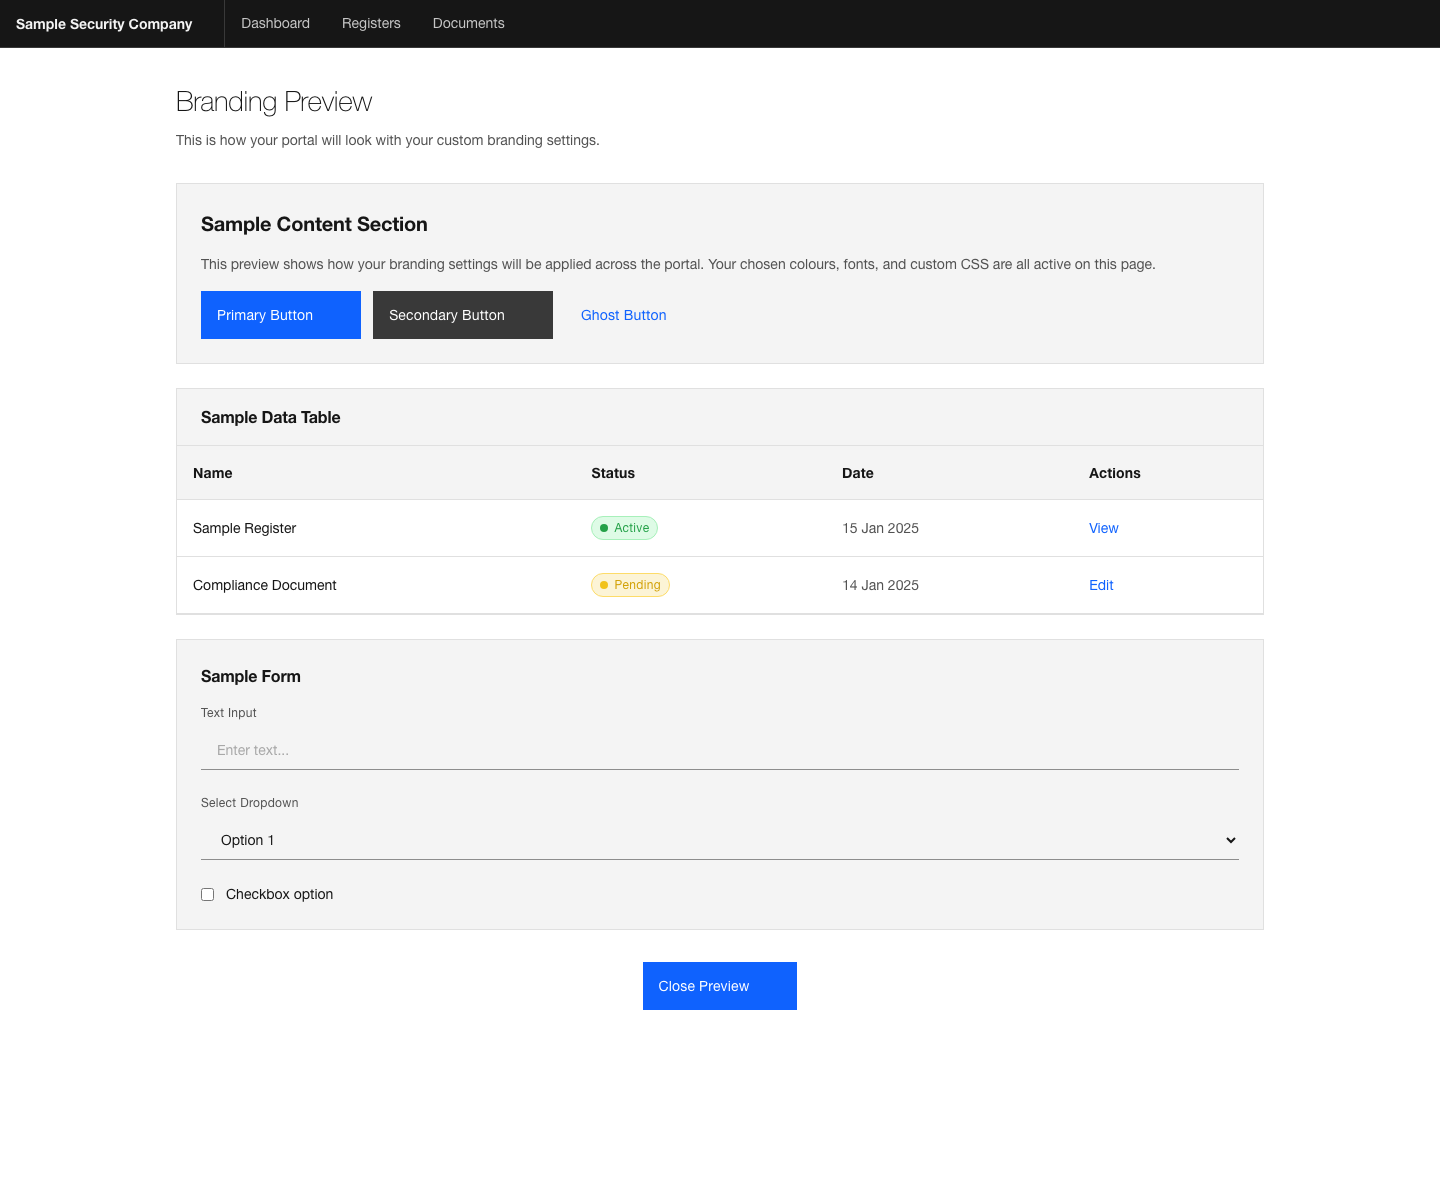
Step 7: Preview Your Branding
Before saving, you can preview how your branding changes will look:
- Click the Preview button on the branding settings page.
- A preview window opens showing how the portal will appear with your changes applied.
- Review the colours, logo placement, and overall appearance.
- If you are satisfied, return to the settings page and click Save.
- If adjustments are needed, modify the settings and preview again.
Step 8: Save Your Changes
- Review all your branding settings.
- Click Save to apply the changes.
- The branding update takes effect immediately for all users in your organisation.
- A confirmation message will appear when the settings are saved successfully.
Tips
- Keep it simple. A single strong brand colour and your logo are usually sufficient. Avoid over-customising with complex CSS, as this can affect the portal’s usability.
- Test with dark and light backgrounds. Your brand colour is used on buttons and links. Ensure it provides enough contrast against both white backgrounds and coloured elements for readability.
- Use a transparent logo. PNG or SVG logos with transparent backgrounds look best against the portal’s header. Logos with white or coloured backgrounds may appear as a box rather than blending seamlessly.
- WCAG accessibility. Your brand colour should meet WCAG AA contrast requirements when used as a button background with white text. Very light or very bright colours may not provide sufficient contrast.
- Preview before saving. Always use the preview function to check your changes before committing them. This avoids unexpected visual issues for your staff.
- Custom CSS requires care. If you add custom CSS and something looks wrong, try disabling it first to isolate the issue. The portal’s layout may change with updates, so keep custom CSS minimal and targeted.
Troubleshooting
- Brand colour not appearing — Ensure the “Enable Custom Branding” toggle is turned on. If branding is disabled, the default styles are used regardless of your colour settings.
- Logo not displaying — Check that the uploaded file is in a supported format (PNG, JPEG, SVG, WebP) and is not corrupted. Try re-uploading the file. If using a URL, verify the URL is publicly accessible.
- Custom CSS breaking the layout — If your custom CSS causes display issues, navigate to the branding settings and clear the Custom CSS field. If you cannot access the settings due to the broken layout, contact Fisher Portal support for assistance.
- Font not loading — Ensure the font name is spelled correctly and is either a web-safe font or available via Google Fonts. Common web-safe fonts include “Arial”, “Helvetica”, “Georgia”, and “Verdana”.
- Changes not visible after saving — Your browser may be caching the old styles. Try a hard refresh (Ctrl+Shift+R on Windows, Cmd+Shift+R on Mac) to reload the styles.
- Cannot access branding settings — Only client admins can manage branding. If you do not see the branding option in the sidebar, you may not have the required permissions.