SharePoint Integration
Overview
If your organisation keeps compliance files in Microsoft SharePoint, Fisher Portal can connect to those libraries so staff can browse the same folder structure inside the portal.
This guide is mainly for Client Admins. The same process can also be completed by a Super Admin or FSC staff member working on your behalf.
Once connected, your team can:
- browse SharePoint-connected libraries from the Libraries area
- keep folder structures consistent between SharePoint and Fisher Portal
- trigger syncs when new files or folders are added
- use synced files as evidence in compliance workflows
Before You Start
Have these details ready before opening the SharePoint settings page:
- Tenant ID for your Microsoft 365 tenancy
- Azure Client ID for the app registration used by Fisher Portal
- Azure Client Secret for that app registration
- SharePoint Site URL for the site that contains your files
- optionally, the Site ID and the specific document library details if your setup requires them
If you do not have these values, ask your Microsoft 365 administrator before continuing.
Microsoft App Setup Requirements
If your Microsoft 365 team has not prepared the Entra app yet, they will usually need to complete that work before Fisher Portal can connect.
Typical Microsoft-side requirements are:
- create an app registration in Microsoft Entra ID
- capture the Application (client) ID and Tenant ID
- create a client secret for the app
- add the correct redirect URI for Fisher Portal
- add and grant the required Microsoft Graph / SharePoint permissions
- grant admin consent where required
Useful Microsoft guides:
- How to register an app in Microsoft Entra ID
- Configure API permissions and grant admin consent
- Get access on behalf of a user with Microsoft Graph
Those Microsoft Learn pages include their own step-by-step screenshots of the Entra admin screens, including:
- the New registration screen
- the app Overview page where the client ID is shown
- the API permissions screen
- the Grant admin consent button and consent state
When handing this over to a client or IT administrator, it is usually best to send them those Microsoft links alongside this Fisher Portal guide.
Step-by-Step Guide
Step 1: Open SharePoint Settings
Navigate to your client area, then open SharePoint Settings for your organisation.
This is the page where you save the Microsoft connection details for your client account.
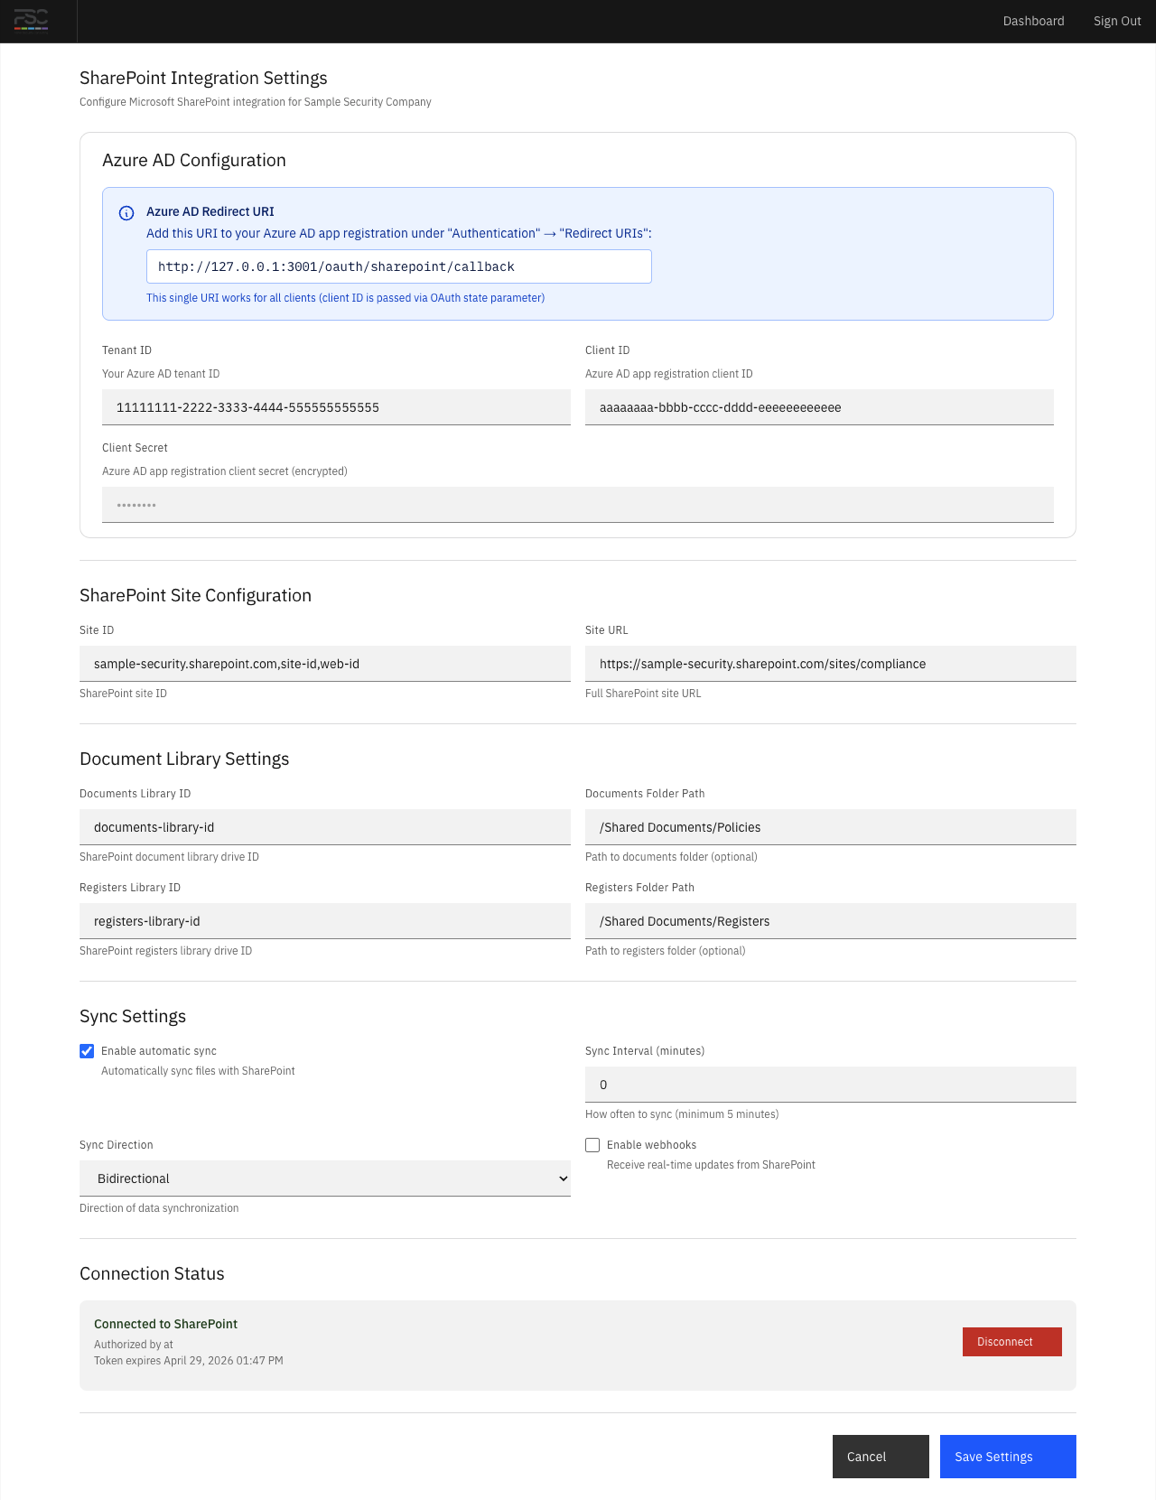
Step 2: Enter the SharePoint Connection Details
Complete the SharePoint settings form with the values provided by your Microsoft 365 administrator.
Typical fields include:
| Field | What It Is |
|---|---|
| Tenant ID | Your Microsoft tenant identifier |
| Azure Client ID | The application ID for the Azure app registration |
| Azure Client Secret | The secret used to authenticate the Fisher Portal app |
| Site URL | The SharePoint site address |
| Site ID | The SharePoint site identifier, if required |
| Documents / Registers library details | The target library and optional folder paths used for sync |
| Sync settings | Whether sync is enabled, how often it runs, and which direction is allowed |
After entering the values, click Save Settings.
Use the settings page screenshot above as a reference when matching each Microsoft field to the values supplied by your Microsoft 365 administrator.
Step 3: Authorise the Microsoft Connection
After saving the settings, click Authorise with SharePoint.
You will be redirected to Microsoft so you can:
- sign in with the correct Microsoft account
- review the requested permissions
- grant consent for the SharePoint connection
When the authorisation succeeds, Fisher Portal redirects you back to the client settings page.
If the page already shows a connected state, your organisation has likely completed this step before and you only need to review or update the saved configuration.
Step 4: Confirm the Connection Worked
After returning to Fisher Portal, check that the SharePoint connection shows as connected.
If the connection does not appear active, review the saved values and try the authorisation step again.
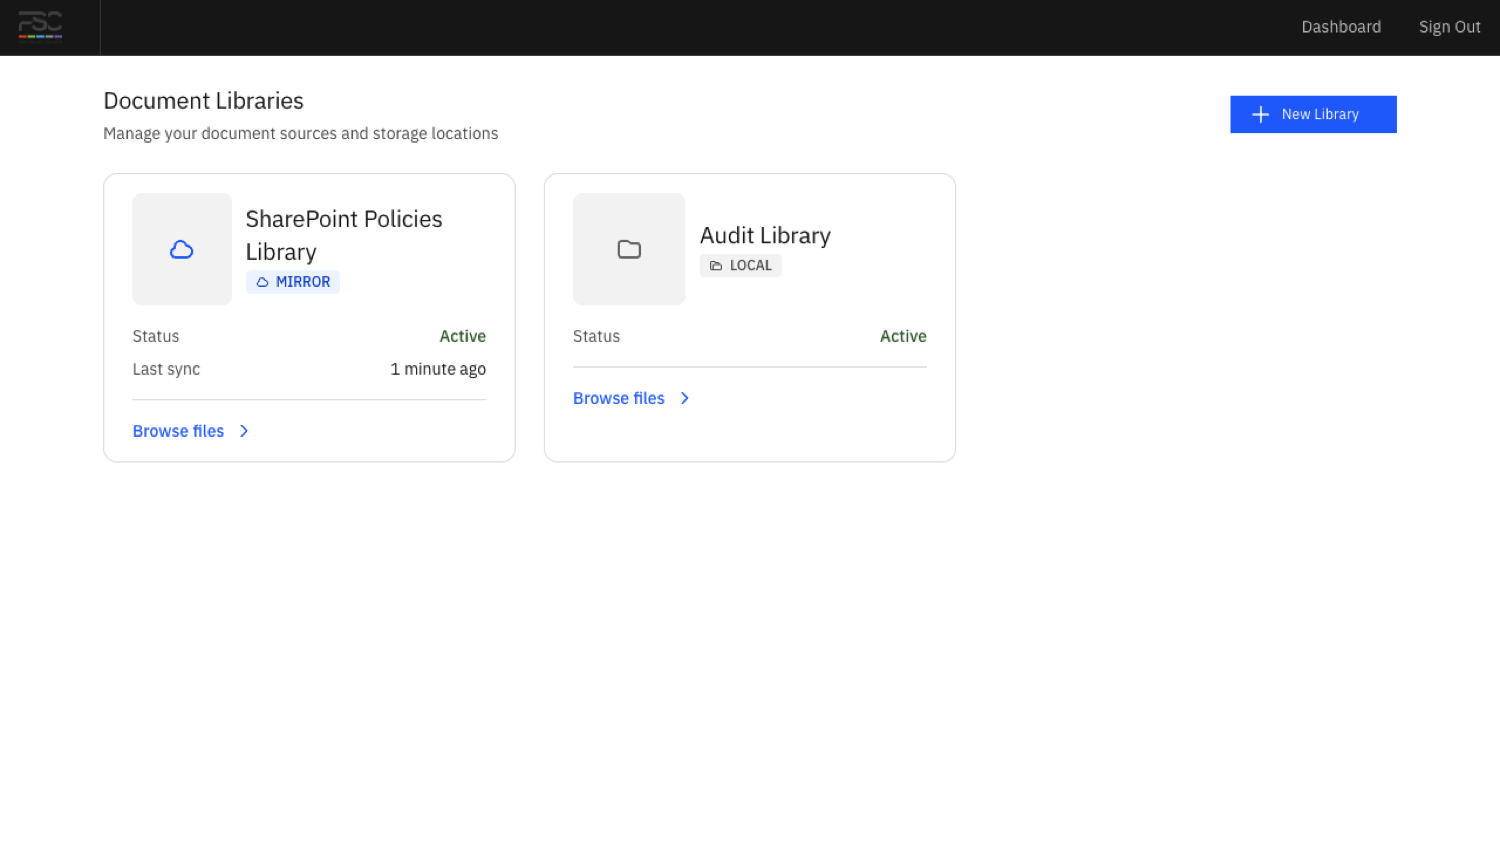
Step 5: Create a SharePoint Library Source
Once the connection is active, go to Libraries and create a new document source for the SharePoint library you want to expose in Fisher Portal.
You will normally provide:
- a clear library name for portal users
- the provider type or SharePoint source option
- the sync mode or sync behaviour
- any provider configuration needed to point at the correct SharePoint location
Create one source for each SharePoint library you want available in the portal.
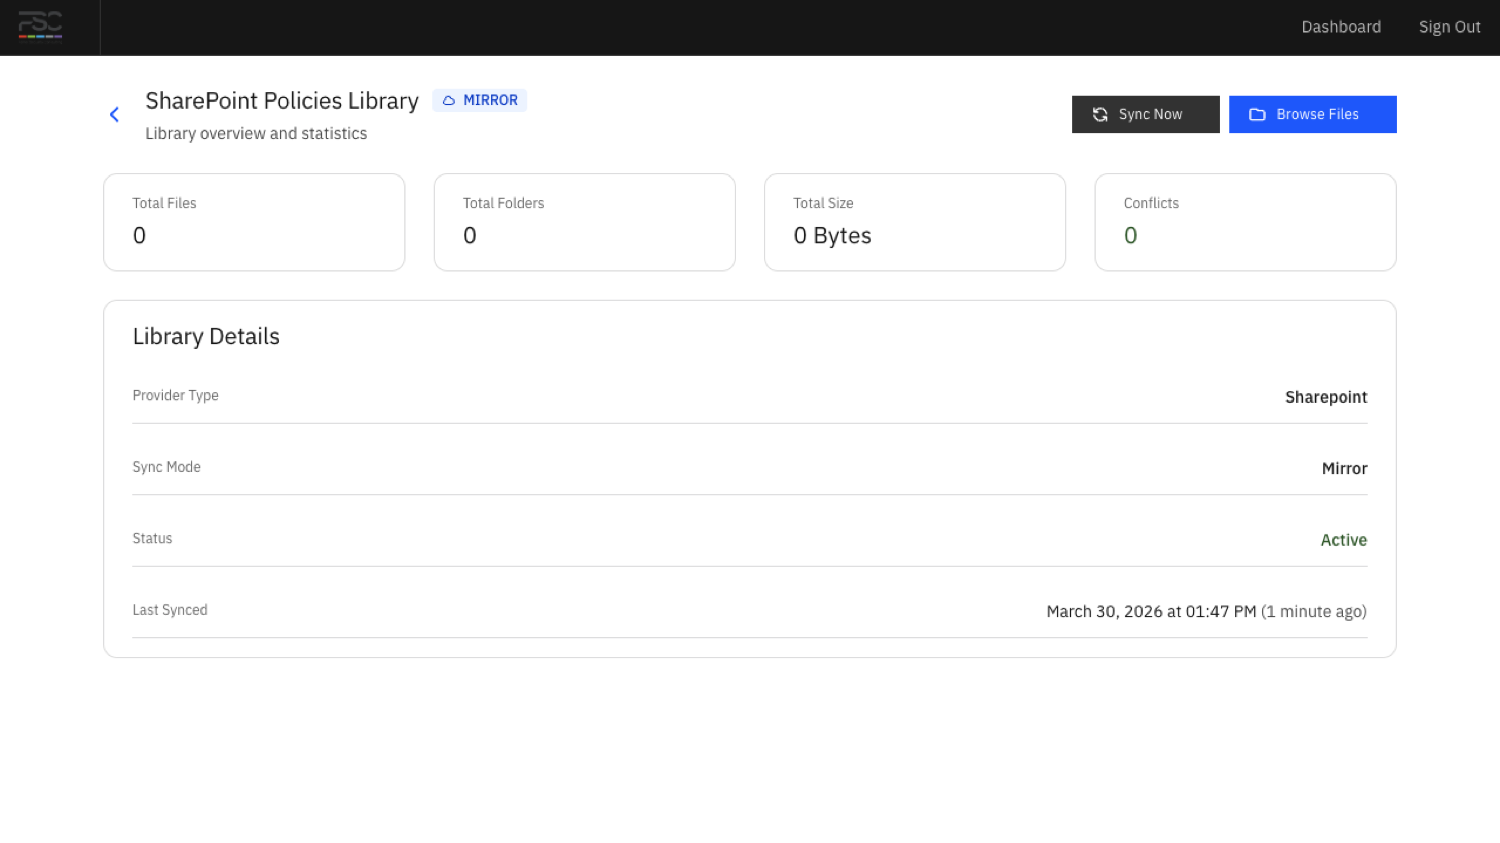
Step 6: Run the First Sync
After creating the library source, open it and trigger Sync Now if that option is available.
The first sync may take a little longer than later syncs because Fisher Portal needs to build the initial folder and file structure.
Check that:
- folders appear in the expected hierarchy
- documents are visible in the library
- sync status does not show an error
Step 7: Verify What Staff Will See
Ask a staff user to open the Libraries section, or verify it yourself from the client view.
Staff should be able to:
- open the connected library
- browse folders and files
- view or download supported documents
For staff-facing behaviour, see Viewing Documents.
How This Fits With Document Management
SharePoint libraries sit alongside your normal document management workflow.
- Use Managing Documents for files stored directly in Fisher Portal
- Use this guide when your files live in SharePoint and need to appear in Fisher Portal
- Use the Evidence Register to reference relevant documents in compliance work once the library is available
Tips
- Start with one library first rather than connecting everything at once. It is easier to test and troubleshoot a smaller setup.
- Use clear library names in Fisher Portal so staff can tell the difference between local documents and SharePoint-backed libraries.
- Check permissions in Microsoft 365 before troubleshooting Fisher Portal. Many sync problems start with missing SharePoint access.
- If you use separate document areas for policies, procedures, and records, create separate library sources so they are easier to manage.
- Re-run a manual sync after major folder changes in SharePoint.
The screenshots above are a good visual checklist: settings first, then libraries, then the individual library sync view.
Troubleshooting
| Problem | What To Check |
|---|---|
| Authorisation fails | Confirm the Tenant ID, Client ID, Client Secret, and Site URL are correct |
| Connection saves but libraries do not appear | Ensure a document source has been created after the SharePoint connection was authorised |
| Sync fails | Check authentication status, library details, and whether the SharePoint app has the right permissions |
| Staff cannot see the Libraries section | Confirm the library source exists for the client and that the user belongs to that client |
| Wrong folders or files appear | Review the configured library and folder path in the SharePoint settings or source configuration |