Viewing Registers
Overview
Registers are the backbone of compliance management in Fisher Portal. A register is a structured table used to track compliance-related data such as health and safety incidents, quality records, information security events, and more. Each register has custom fields defined by your administrator, making them flexible enough to capture exactly the data your organisation needs.
As a Client Staff member, you can browse all registers assigned to your organisation and view the entries within them. You cannot create new registers or configure their fields — that is managed by your Client Admin.
Step-by-Step Guide
Step 1: Navigate to Registers
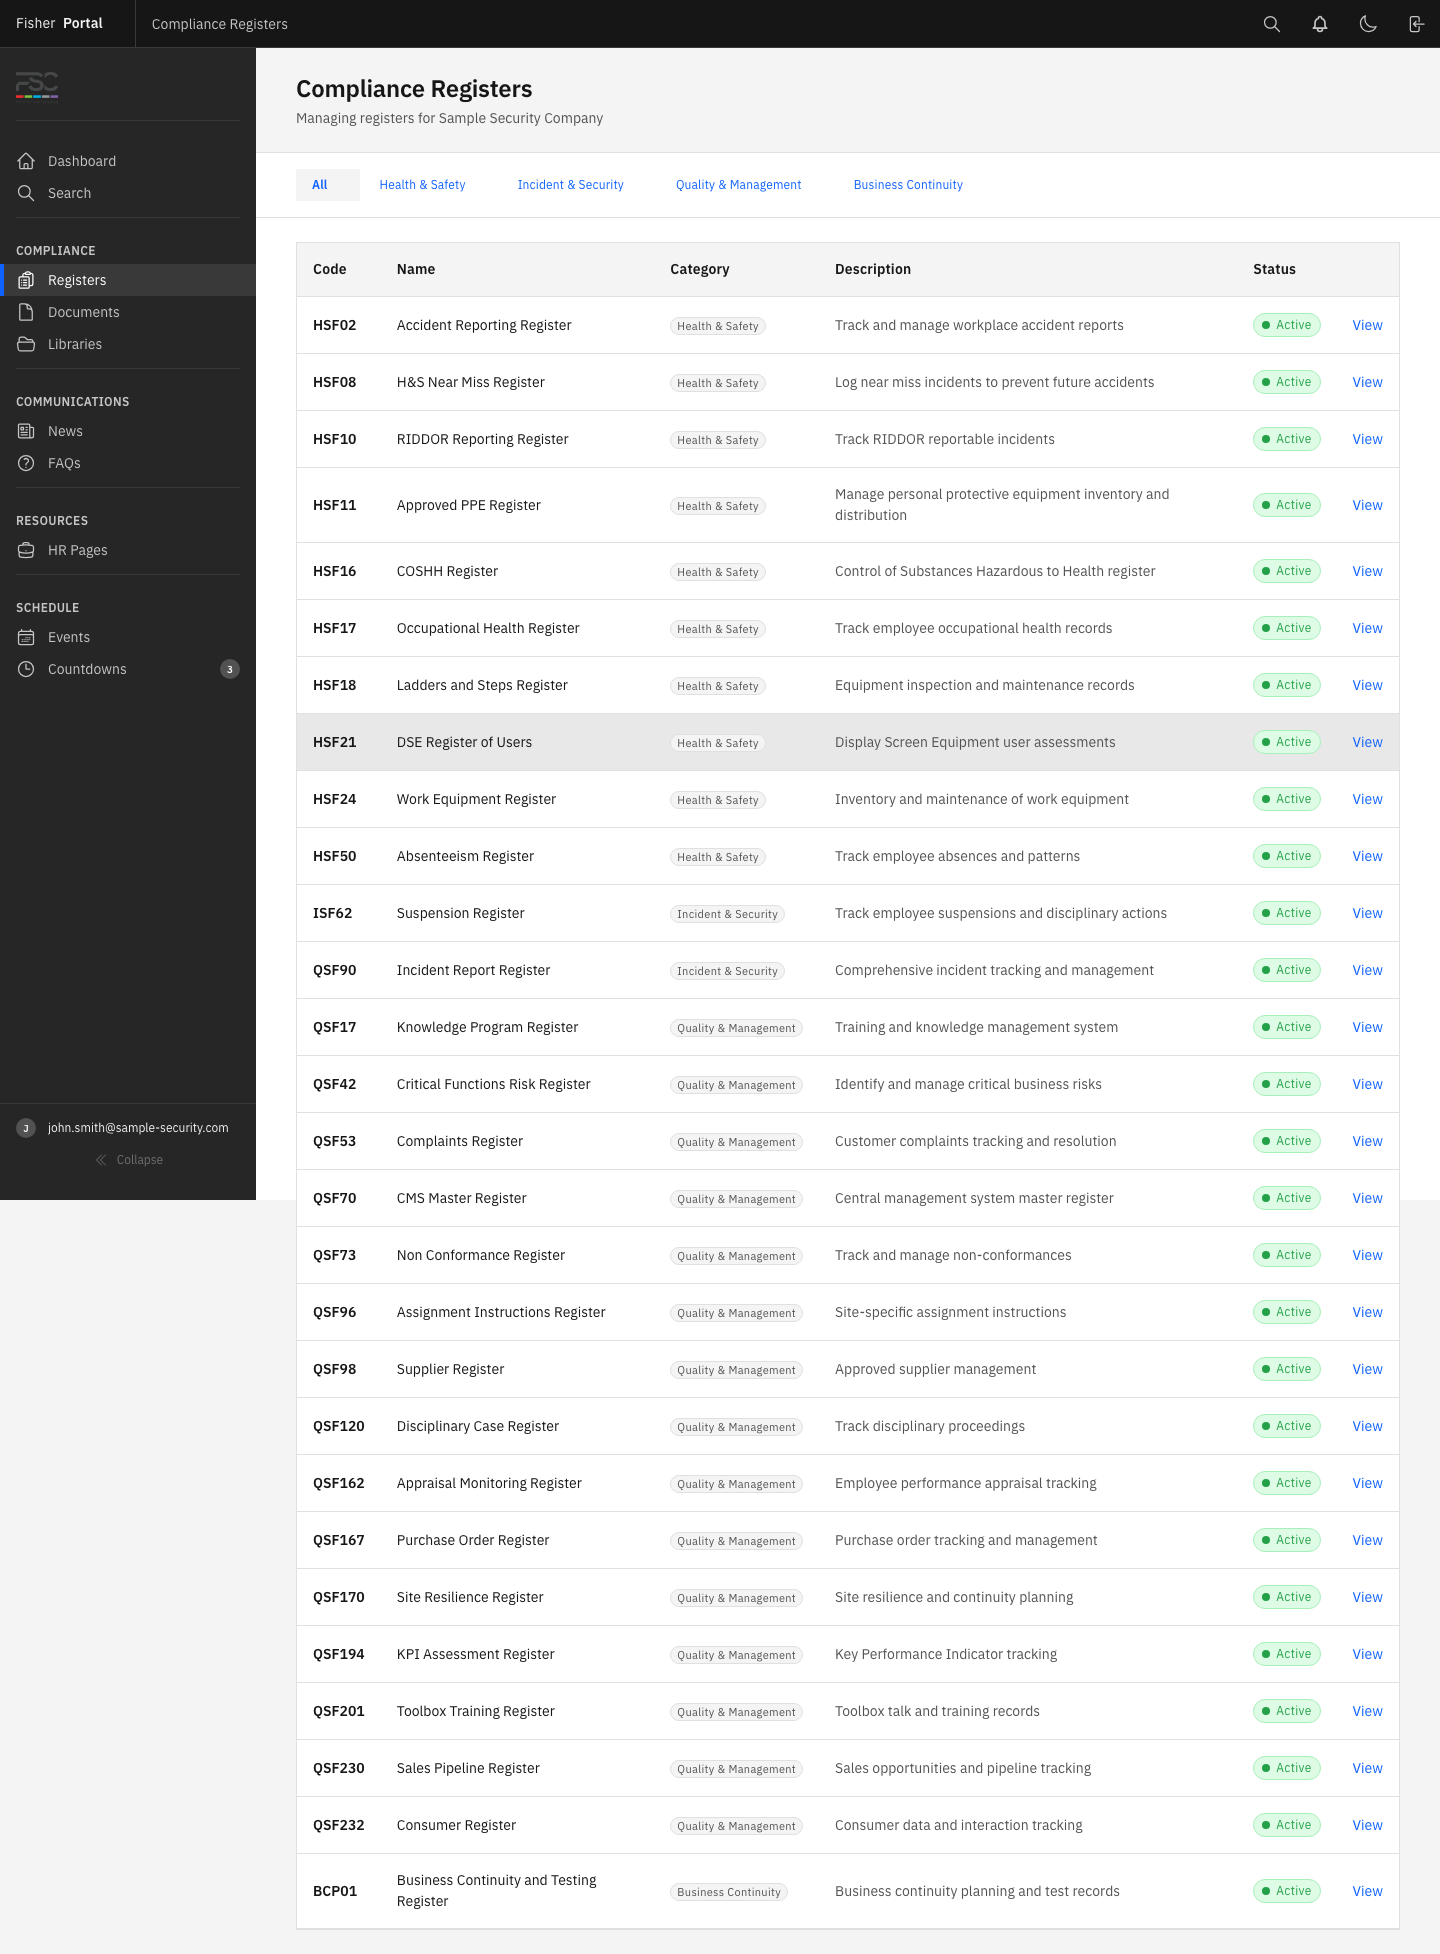
Click Registers in the sidebar navigation under the Compliance section. This opens the registers list page showing all registers available to your organisation.
Each register in the list displays:
- Register name (e.g. “Accident/Incident Register”, “CCTV Log”)
- Register code (e.g. “HSF-01”, “QSF-03”)
- Category (e.g. Health and Safety, Quality, Information Security)
- Number of entries currently in the register
- Status (Active or Inactive)
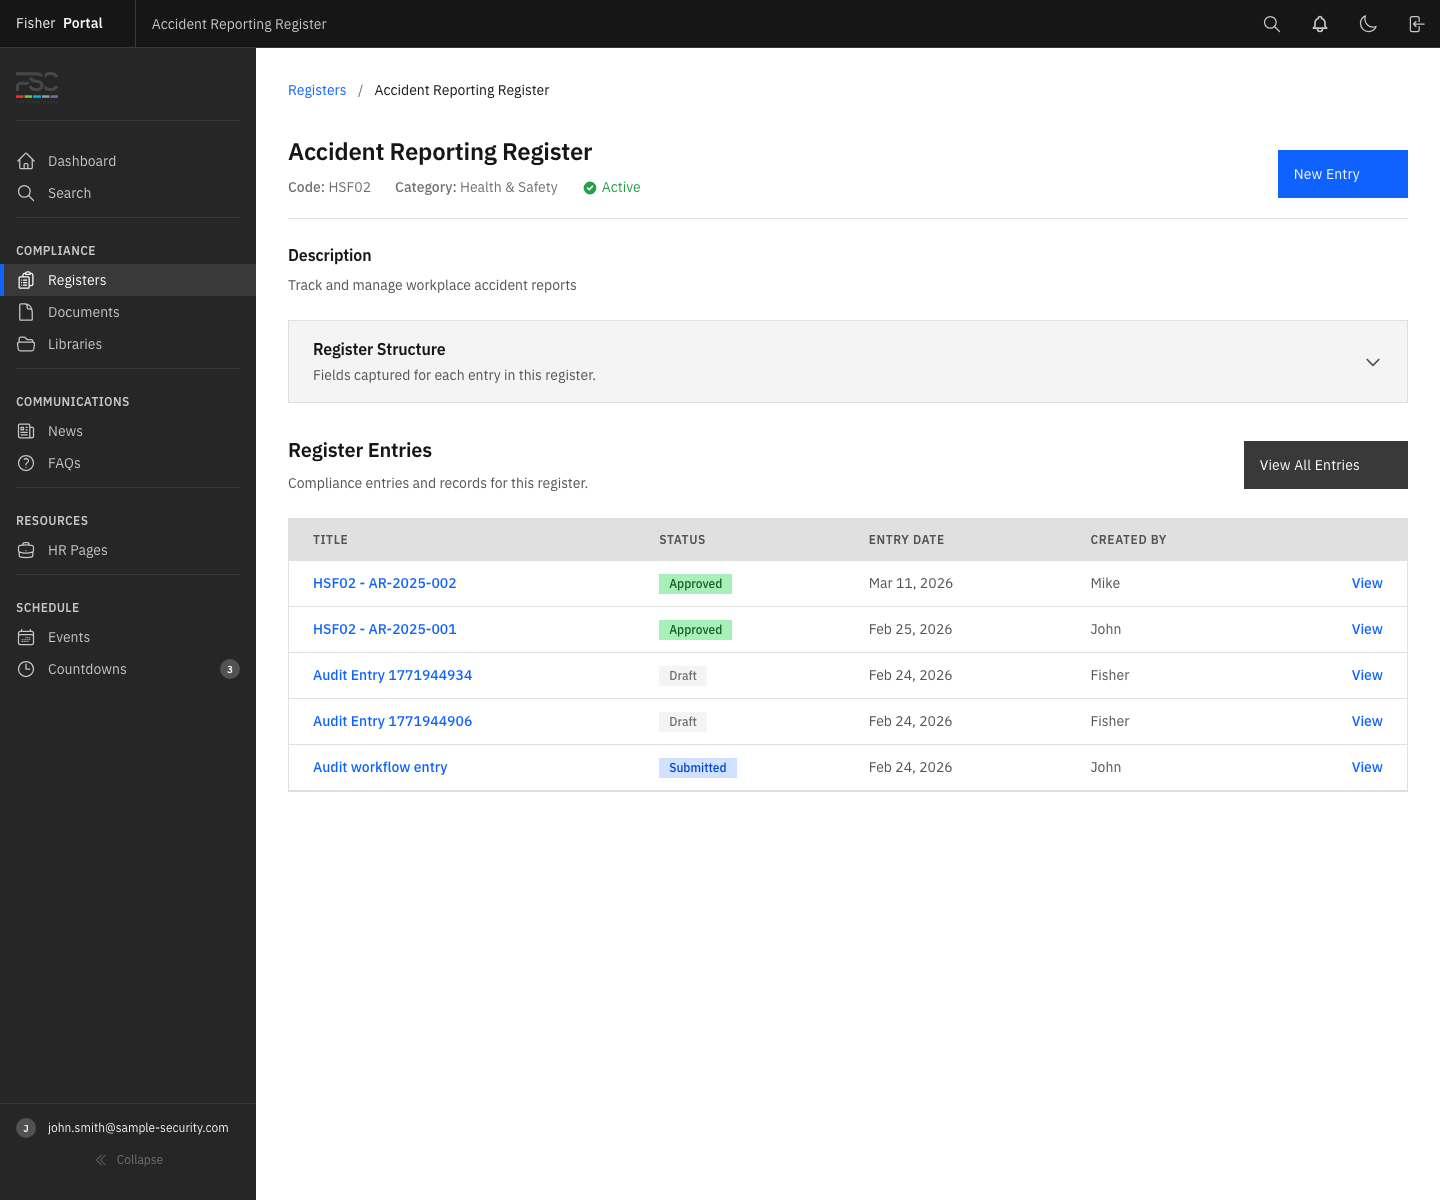
Step 2: Open a Register
Click on a register name or row to open it. The register detail page shows:
- Register information at the top (name, code, description, category)
- Field definitions — the columns that make up the register
- Entries table — all current entries in a table format, sorted by entry date (most recent first)
Step 3: Understand the Register Structure
Each register is made up of fields that define what data is captured. Common field types include:
| Field Type | Description | Example |
|---|---|---|
| String | Short text | Employee name, location |
| Text | Long text | Description of incident |
| Integer | Whole number | Number of people affected |
| Decimal | Number with decimal places | Temperature reading |
| Date | Calendar date | Date of incident |
| Boolean | Yes/No | RIDDOR reportable? |
| Single select | Choose one option from a list | Severity (Low/Medium/High) |
| Multi select | Choose multiple options from a list | Categories involved |
| Currency | Monetary value | Cost of rectification |
| Percentage | Percentage value | Completion rate |
| Email address | Contact email | |
| Phone | Phone number | Emergency contact |
| URL | Web address | Link to external report |
| File | File attachment | Supporting evidence |
| User | A user from the organisation | Assigned to |
Fields are displayed in a specific order set by the administrator. Required fields are marked accordingly.
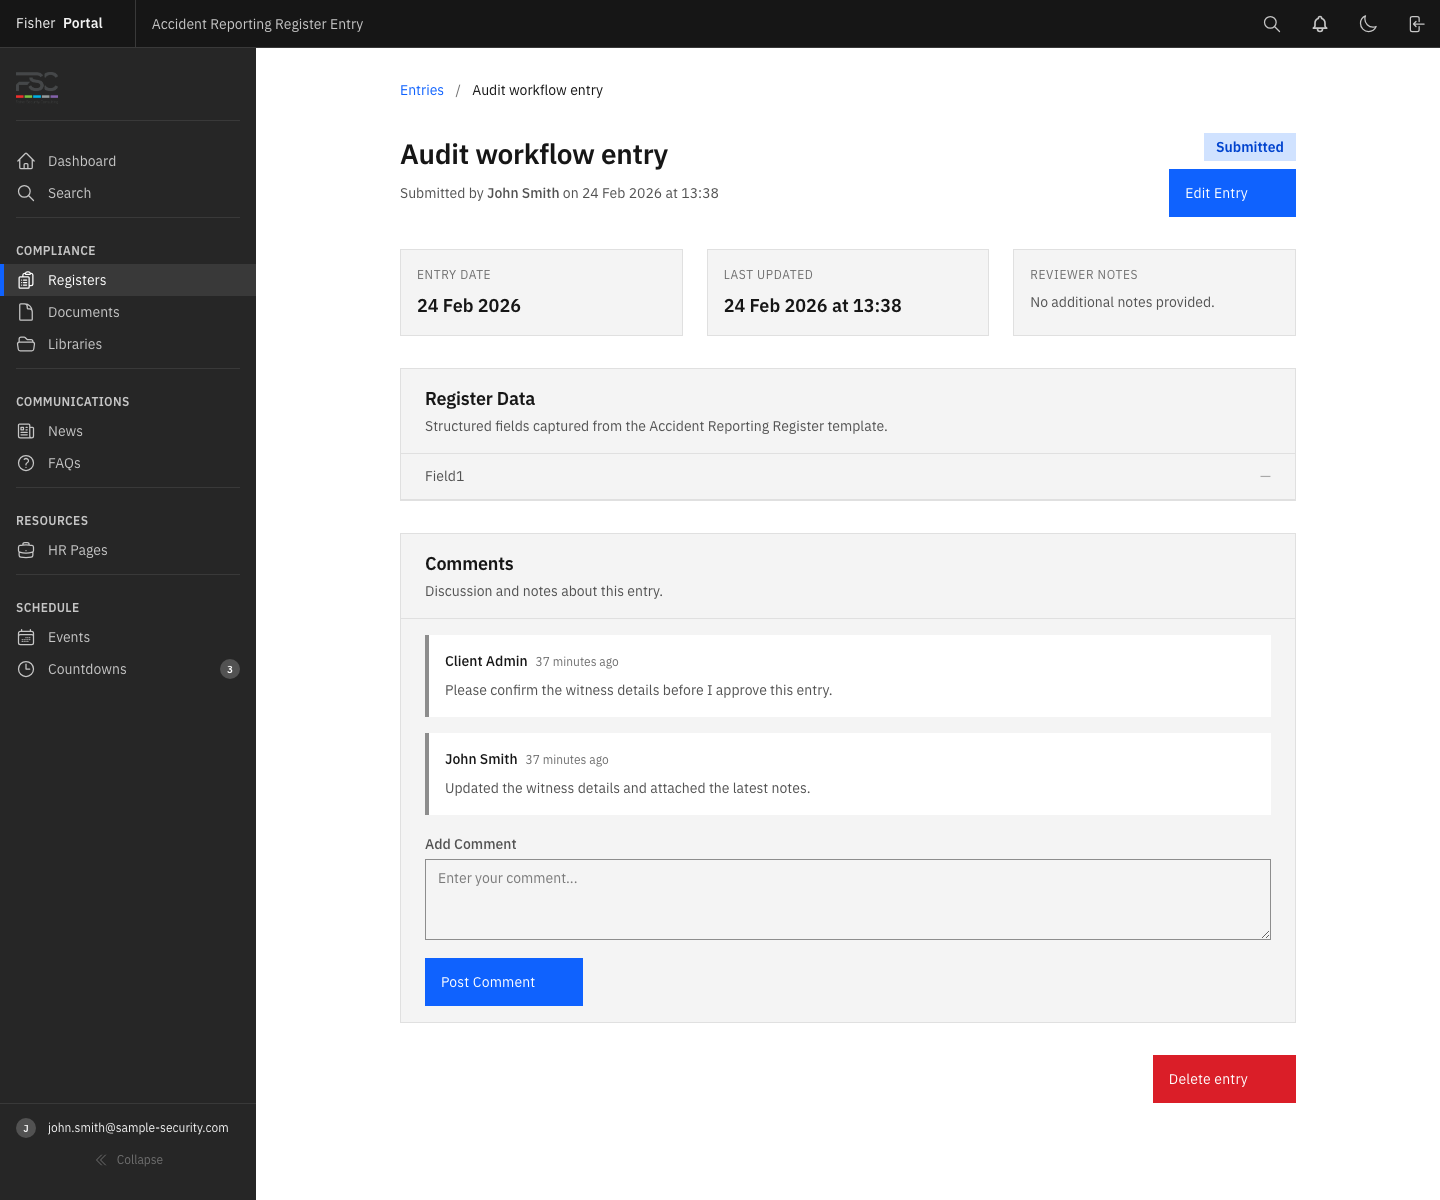
Step 4: View a Specific Entry
Click on any entry row in the table to open the full entry detail view. The entry page shows:
- Title — automatically generated or manually set
- Entry date — when the entry was recorded
- Status badge — one of Draft, Submitted, Approved, or Rejected
- All field values — displayed in the order defined by the register
- Created by — the user who created the entry
- Reviewed by — the user who approved or rejected the entry (if applicable)
- Comments — any comments added during the approval workflow
Step 5: Filter and Search Entries
Within a register, you can:
- Search entries by title, description, or field values using the search bar
- Filter by status (Draft, Submitted, Approved, Rejected) to find entries in a specific stage
- Sort entries by entry date or creation date
Entry Statuses Explained
Each register entry goes through a workflow with four possible statuses:
| Status | Colour | Meaning |
|---|---|---|
| Draft | Grey | Entry has been created but not yet submitted for review |
| Submitted | Blue | Entry has been submitted and is awaiting approval |
| Approved | Green | Entry has been reviewed and approved by an administrator |
| Rejected | Red | Entry has been reviewed and sent back for corrections |
As a Client Staff member, you will primarily work with Draft and Submitted entries. See Creating Register Entries for details on creating and submitting entries.
Tips
- Use search to find specific entries: If the register has many entries, use the search bar to quickly find what you need by typing keywords from any field.
- Check the status column: A quick glance at the status column tells you which entries still need attention (Draft or Rejected) and which have been finalised (Approved).
- Registers are client-scoped: You will only see registers that belong to your organisation. If you belong to multiple organisations, switch to the relevant client context to see their registers.
Troubleshooting
| Problem | Solution |
|---|---|
| No registers visible | Your organisation may not have any registers deployed yet. Contact your Client Admin. |
| Cannot find a specific entry | Use the search bar or check the status filter. The entry may be in a different register. |
| Register appears empty | No entries have been created yet. See Creating Register Entries to add the first entry. |
| Cannot see the Registers link in the sidebar | Ensure you are viewing a client context. Super Admins need to select a client first using the client switcher. |