Evidence Management
Overview
The Evidence Register maps documents, records, and external resources to specific standard clauses, building a comprehensive evidence pack for each client. During certification audits, this evidence demonstrates that compliance requirements are being met.
Evidence links connect a source (a portal document or an external URL) to a standard and optionally a specific clause. Each evidence link also carries a type, verification status, and optional notes to provide full context.
Evidence Types
| Type | Description |
|---|---|
| Policy | Organisational policies (e.g. Quality Policy, Information Security Policy) |
| Procedure | Documented procedures and work instructions |
| Register | Compliance registers and logs |
| Record | Completed records (e.g. signed forms, completed checklists) |
| Training | Training records, certificates, and competency evidence |
| Minutes | Meeting minutes (e.g. management review minutes) |
| KPI | Key performance indicators and metrics |
| Contract | Contractual documents and service level agreements |
| Other | Any evidence that does not fit the above categories |
Verification Status
Evidence links track when they were last verified to ensure ongoing relevance. The verification window is 365 days:
| Status | Meaning |
|---|---|
| OK | Last verified within the past 12 months |
| Overdue | Last verified more than 12 months ago |
| Never verified | No verification date has been recorded |
Step-by-Step Guide
Step 1: View the Evidence Register
Navigate to your client’s compliance area and select Evidence register from the navigation links. The evidence register displays a table of all evidence links for the selected client.
The table shows:
- Evidence — the title, linked document name (with preview/open links), or external URL
- Standard / Clause — the standard and clause the evidence relates to
- Type — the evidence type (Policy, Procedure, Record, etc.)
- Last verified — the date the evidence was last verified
- Status — OK, Overdue, or Never verified
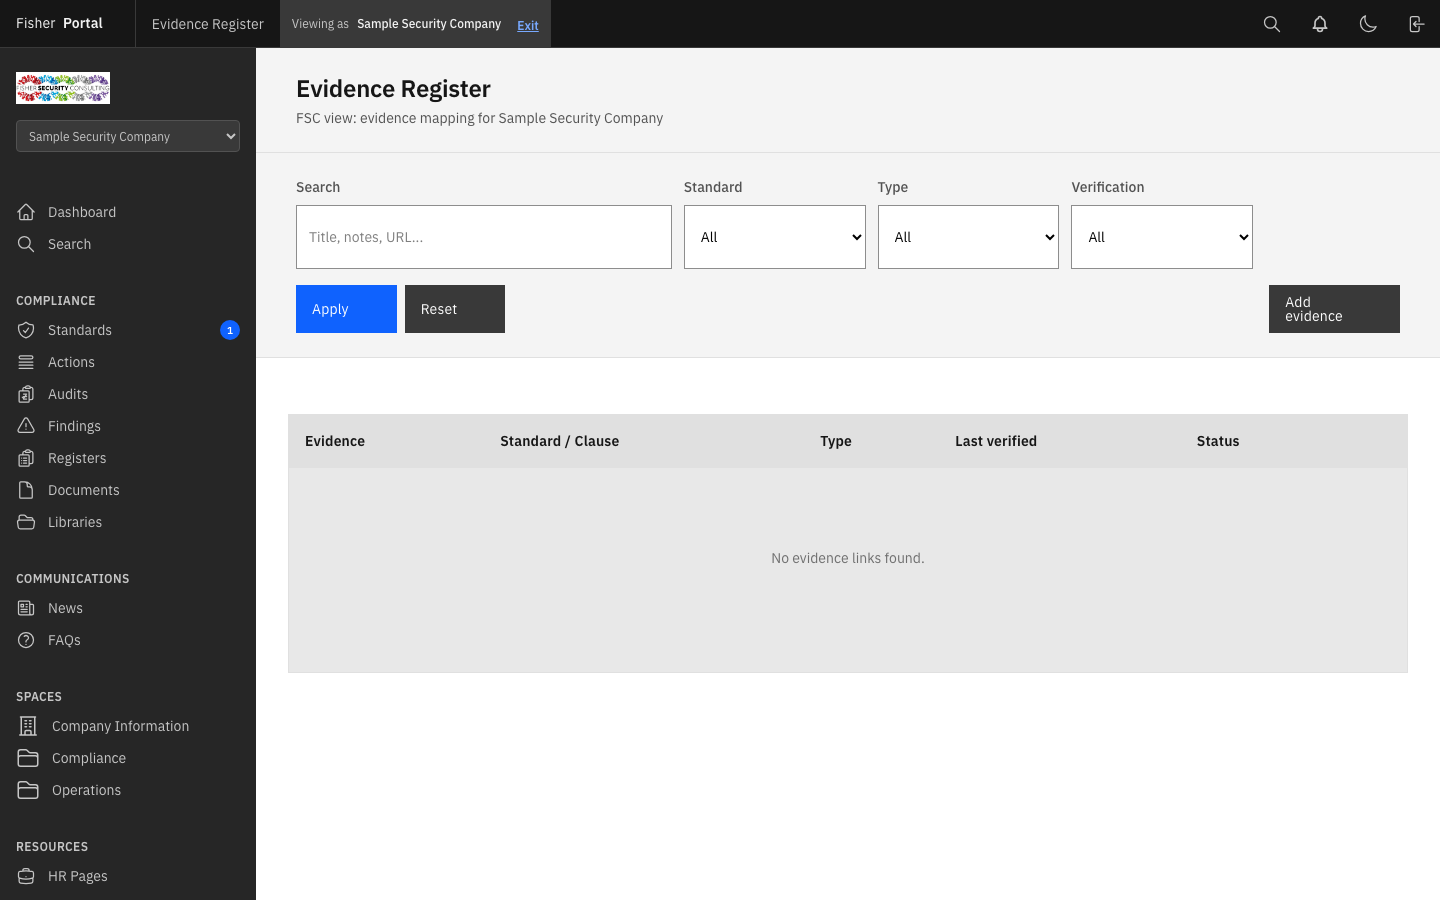
Step 2: Filter the Evidence Register
Use the filter bar to narrow down the list:
| Filter | Options |
|---|---|
| Search | Free text search across title, notes, and external URL |
| Standard | Filter by a specific enabled standard |
| Type | Filter by evidence type (Policy, Procedure, Record, etc.) |
| Verification | All, OK, Overdue, or Never verified |
Click Apply to activate your filters, or Reset to clear them.
Tip: Use the Verification filter set to “Overdue” to quickly identify evidence that needs re-verification.

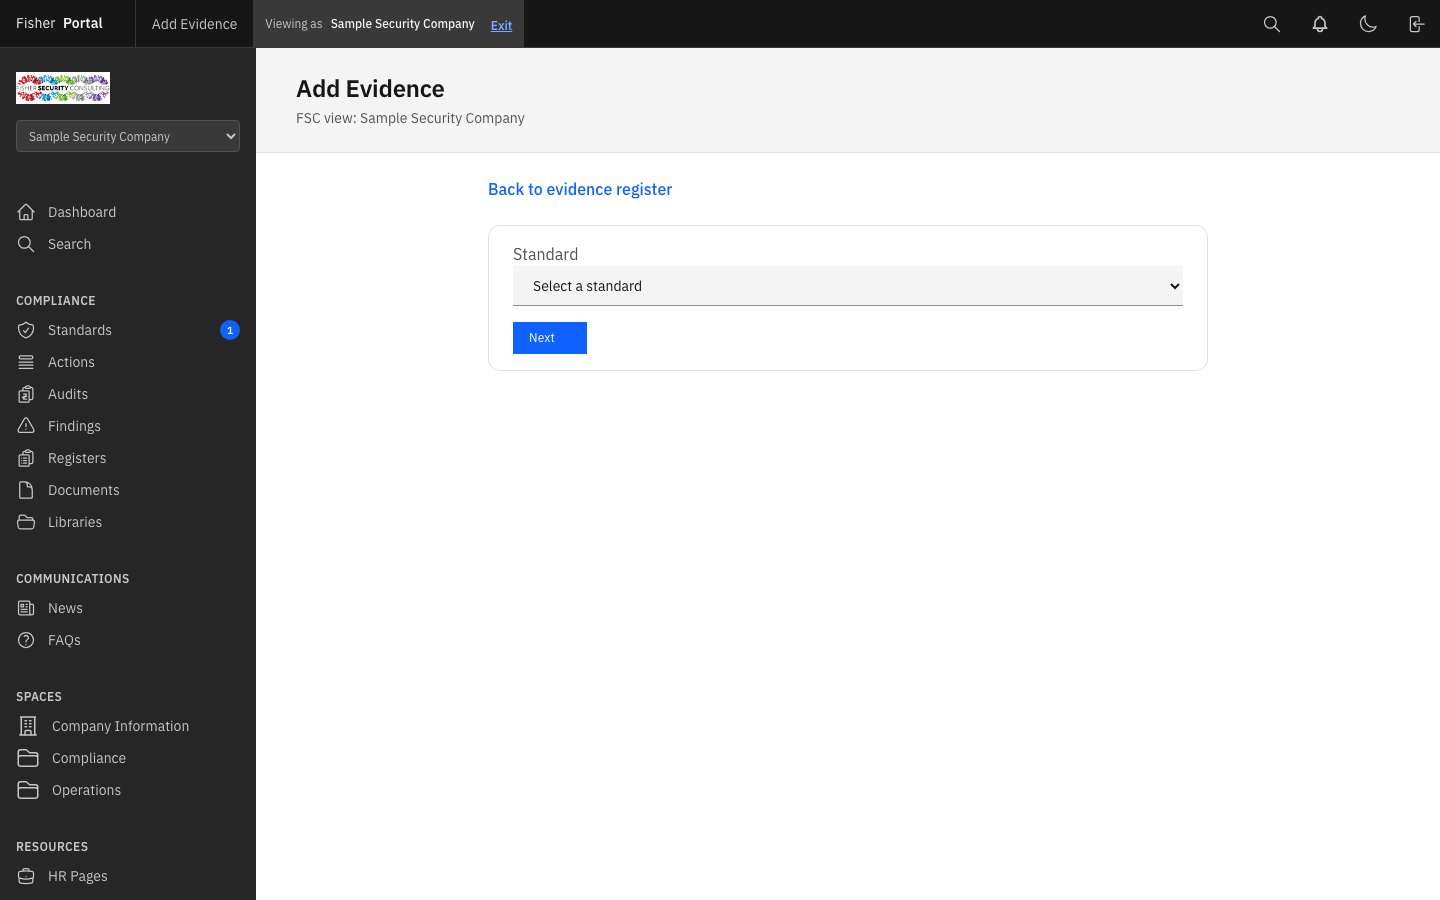
Step 3: Create a New Evidence Link
- Click the Add evidence button on the evidence register page.
- The form follows a two-step process:
Step 3a: Select the Standard
If you have not pre-selected a standard, you will first be asked to choose which standard this evidence relates to. Select the standard from the dropdown and click Next.
Step 3b: Complete the Evidence Details
Once a standard is selected, the full form appears:
| Field | Required | Description |
|---|---|---|
| Standard | Yes | Pre-selected from Step 3a (shown as read-only) |
| Document evidence | Conditional | Attach a portal document from the client’s document library. Use the Library dropdown, search for files, and click Select to attach. |
| Clause | No | Link to a specific clause within the standard |
| Evidence title | Yes | A descriptive name for this evidence item |
| Type | Yes | Select the evidence type (Policy, Procedure, Record, etc.) |
| Owning department | No | Which department is responsible for this evidence |
| External URL | Conditional | A SharePoint or external link. Required if no portal document is attached. |
| Last verified | No | The date this evidence was last reviewed and confirmed as current |
| Notes | No | Any additional context or commentary |
Important: You must provide either a portal document or an external URL (or both). The form will not save without at least one.
- Click Add evidence to save.
Step 4: Attach a Portal Document
When creating evidence, you can link directly to a document stored in the client’s document library:
- In the “Document evidence” section, select a Library from the dropdown (these are the client’s configured document sources).
- Optionally use the Search files field to filter by filename.
- Click Search to find matching documents.
- A list of recent files will appear. Click Select next to the document you want to attach.
- The selected document will be confirmed in the form, and you can proceed to fill in the remaining fields.
If you need to change the selected document, click Change to return to the document picker.
Step 5: Remove an Evidence Link
From the evidence register table, click Remove next to the evidence link you wish to delete. You will be asked to confirm before removal.
Note: Removing an evidence link does not delete the underlying document — it only removes the connection between the document and the standard/clause.
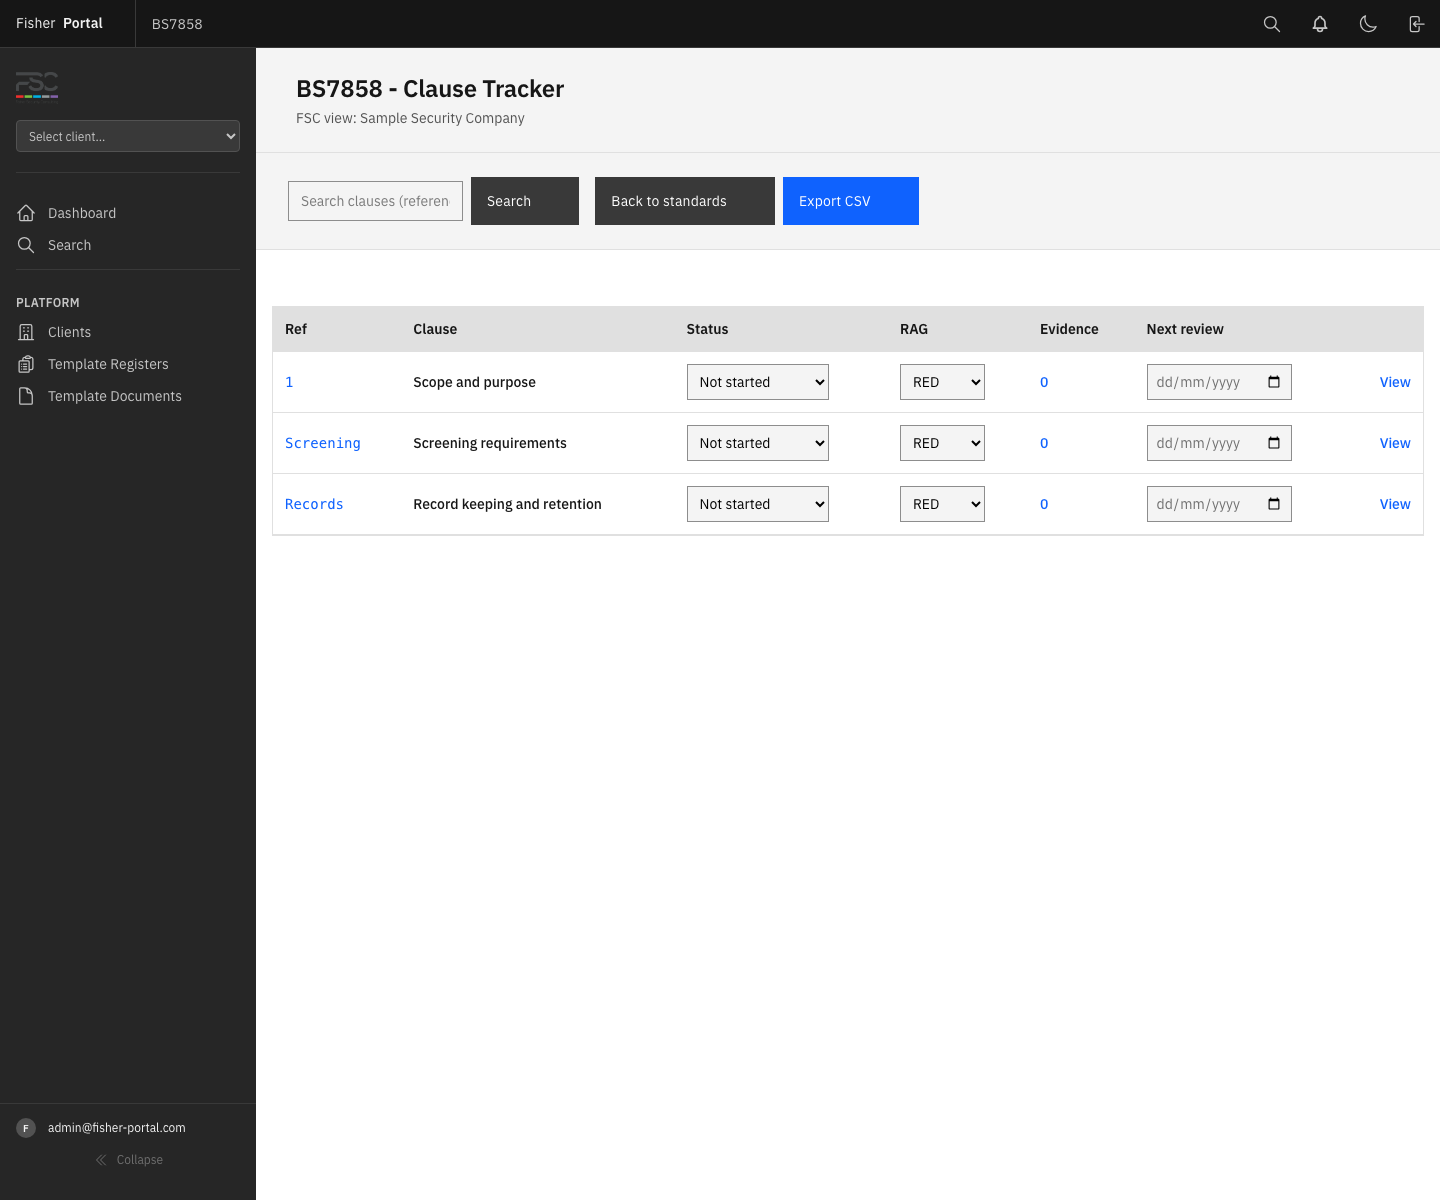
Accessing Evidence from the Clause Tracker
The clause tracker (standard detail page) shows an Evidence count for each clause. Clicking the count links directly to the evidence register, pre-filtered to show evidence for that specific standard and clause.
This makes it easy to:
- Check which clauses have supporting evidence
- Identify gaps where evidence is missing
- Navigate between clause status tracking and evidence management
Tips
- Build evidence packs incrementally as you work through the clause tracker. Do not wait until audit time to map evidence.
- Use the portal document picker rather than external URLs where possible. Portal documents are version-controlled and always accessible within Fisher Portal.
- Set the “Last verified” date when you confirm that evidence is current and relevant. This drives the verification status indicator.
- Review overdue verifications regularly — evidence that has not been verified in over 12 months may no longer be current.
- Use evidence types consistently across clients. This makes it easier to identify patterns and gaps.
- Link evidence to specific clauses rather than just the standard level. Clause-level evidence mapping is what auditors look for during certification.
- Use the owning department field to clarify who is responsible for maintaining each piece of evidence. This is especially useful for large organisations.
Troubleshooting
- “Provide a document or an external URL” error — Every evidence link must have at least one source: either a portal document or an external URL. Attach a document or enter a URL.
- “Clause must belong to the selected standard” error — The selected clause does not belong to the chosen standard. Ensure you are selecting a clause from the correct standard.
- No libraries showing in the document picker — The client must have at least one document source (library) configured. Check the client’s document sources setup.
- No files found when searching — Try broadening your search term, or clear the search to see all recent files. Only the 50 most recently updated files are shown.
- Cannot see the evidence register — Ensure you are logged in as FSC staff and have navigated to the correct client’s compliance area.
- Evidence showing as “Never verified” — Set the “Last verified” date when you create or review evidence. This field is not set automatically.