Managing Clients
Overview
Clients are the organisational units of Fisher Portal. Each client represents a security company or organisation that uses the platform for their compliance management. As a Super Admin, you can create new client organisations, view their details, edit their settings, deploy compliance templates, and remove clients when necessary.
Every piece of data in the portal — registers, documents, users — is scoped to a client. When you create a new client, they start with a blank slate until you deploy templates or assign users to them.
Step-by-Step Guide
Step 1: View All Clients
Navigate to Clients in the left sidebar under the Admin section. The clients list shows every registered organisation on the platform.
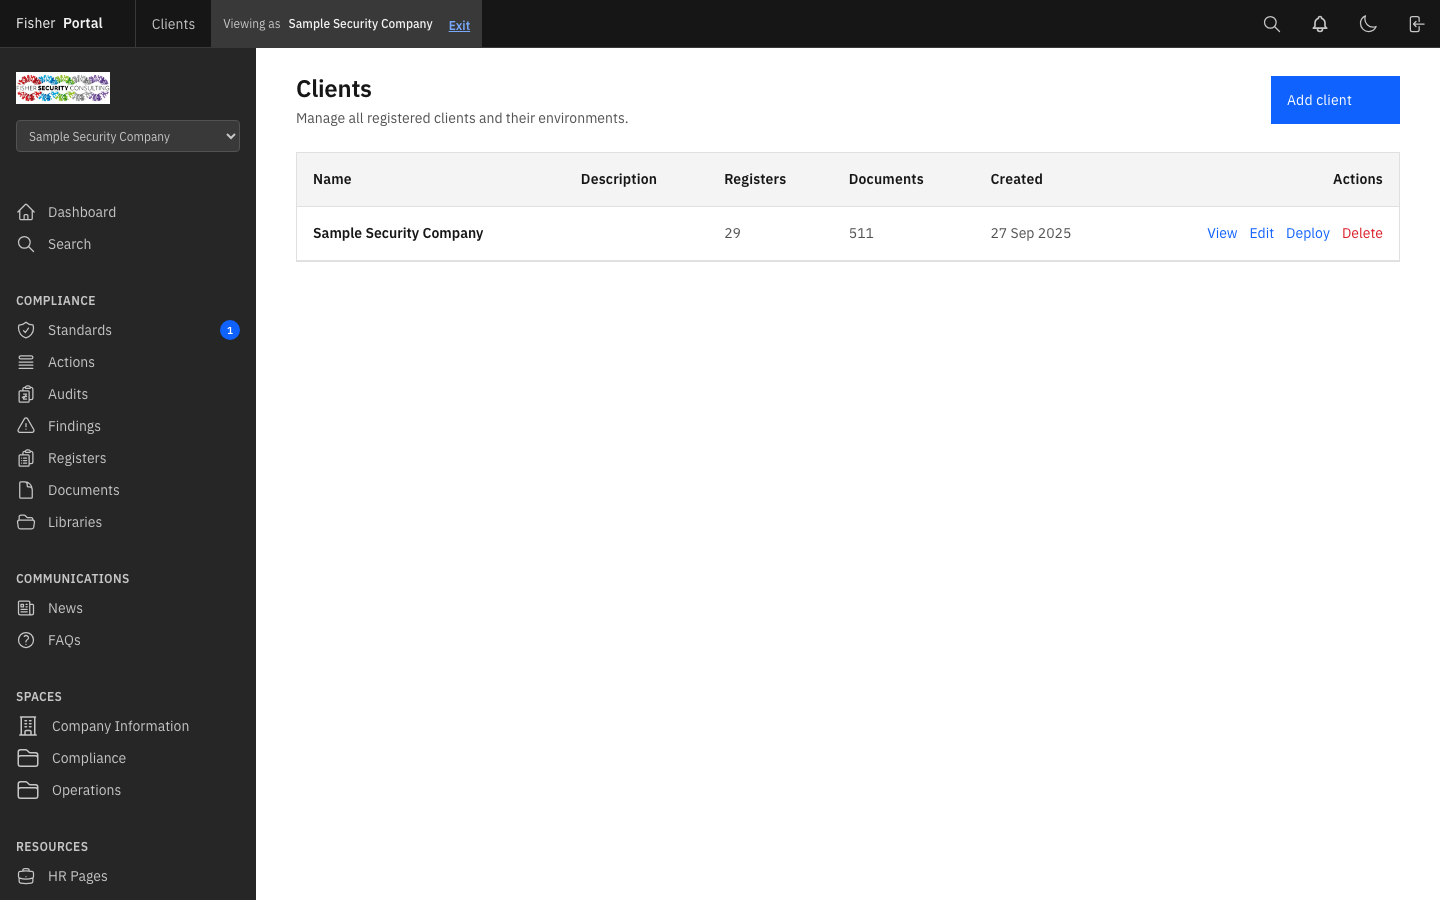
The table displays the following information for each client:
| Column | Description |
|---|---|
| Name | The client organisation’s name |
| Description | A brief description of the organisation (if provided) |
| Registers | Number of compliance registers deployed to this client |
| Documents | Number of documents deployed to this client |
| Created | Date the client was added to the platform |
| Actions | Links to View, Edit, Deploy, and Delete the client |
Step 2: Create a New Client
- From the clients list, click the Add client button in the top-right corner.
- Complete the new client form:
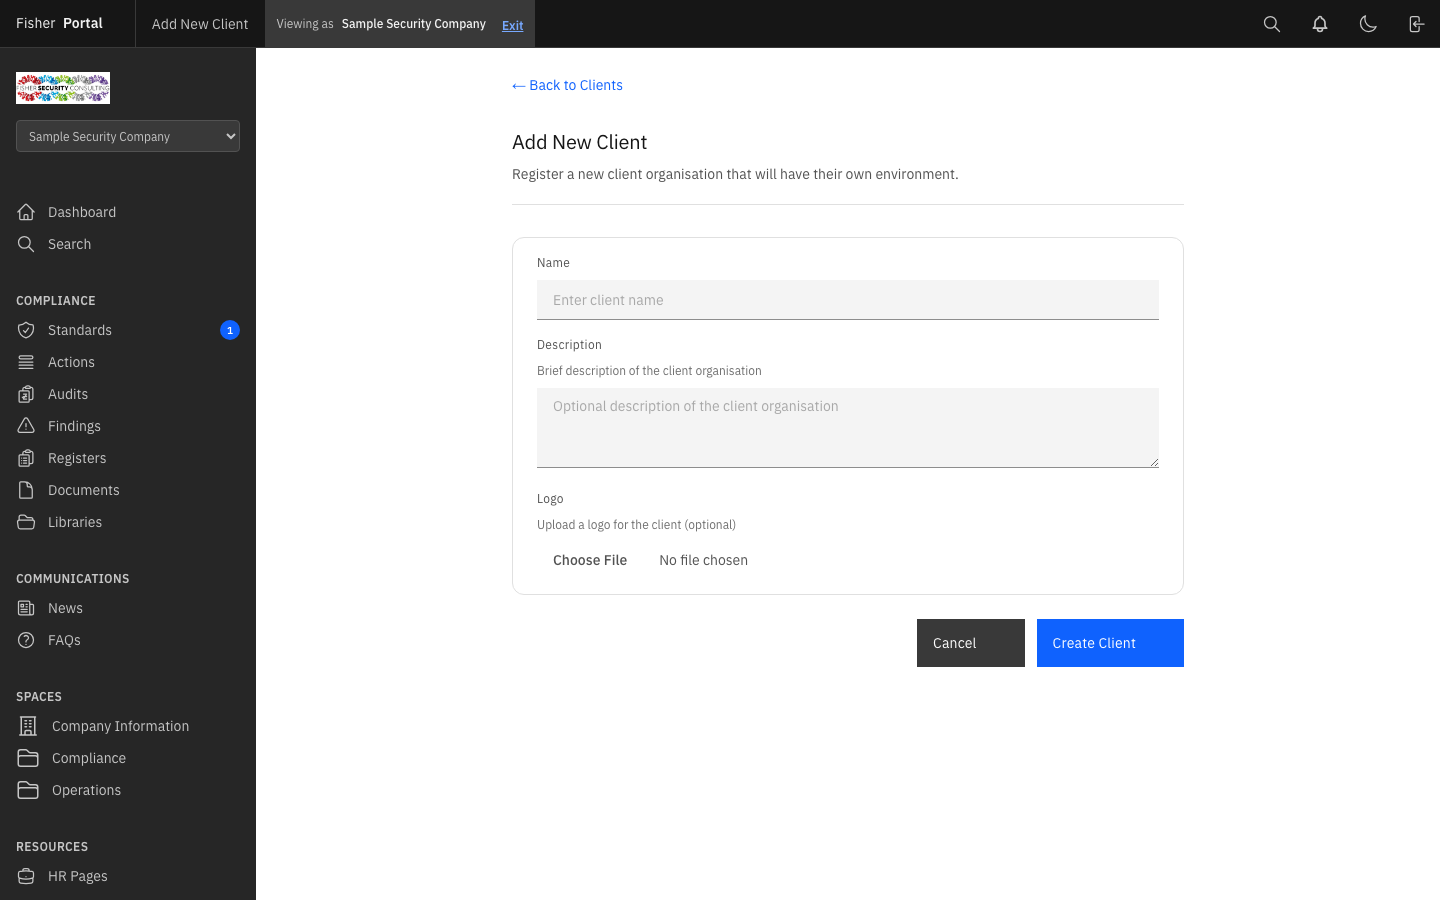
| Field | Required | Description |
|---|---|---|
| Name | Yes | The organisation’s name (e.g. “Guardian Security Solutions”) |
| Description | No | A brief description of the client organisation |
| Logo | No | Upload the client’s logo (displayed in their branded portal experience) |
- Click Create Client to save the new organisation.
- You will be redirected to the client’s detail page, where you can immediately begin deploying templates or assigning users.
Step 3: View Client Details
Click View next to any client in the list (or click the client name from the dashboard) to see their full detail page.
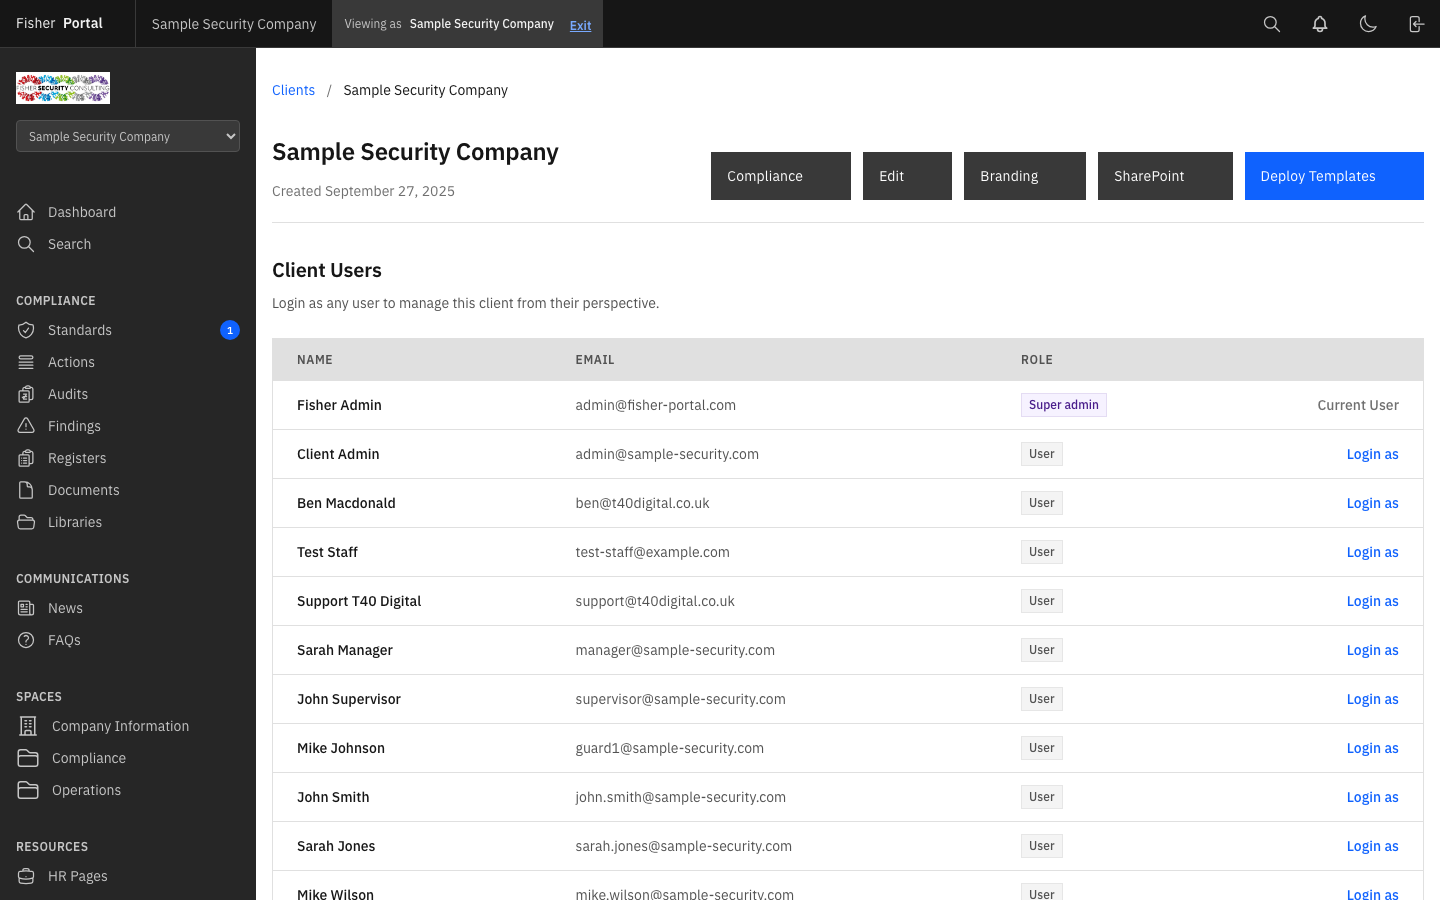
The client detail page shows:
- Organisation information — name, description, and logo
- Users — all users assigned to this client via memberships, with their roles and a “Login as” button for quick impersonation
- Registers — all compliance registers deployed to this client
- Documents — all documents available to the client
Step 4: Edit a Client
- From the clients list, click Edit next to the client you wish to modify.
- Update the client’s name, description, or logo as needed.
- Click Update Client to save your changes.
Step 5: Deploy Templates to a Client
Deploying templates is how you provision a client with compliance registers and documents. See the Template Management guide for full details on this workflow.
- From the clients list, click Deploy next to the target client.
- Select the register and document templates you wish to deploy.
- Click Deploy Selected Templates to create client-specific copies.
Step 6: Delete a Client
- From the clients list, click Delete next to the client you wish to remove.
- Confirm the deletion when prompted.
Important: Deleting a client uses soft deletion — the record is marked as deleted but can be recovered if needed. All associated data (registers, documents, memberships) will also be soft-deleted.
Tips
- Give each client a clear, descriptive name that matches their trading name. This makes it easier to find them in the client context switcher and search.
- Upload client logos early — they appear in the client’s branded portal experience and help users feel at home.
- Before deploying templates, review the client’s existing registers to avoid duplicating work. The deployment form shows an “Already Deployed” badge next to templates that have already been provisioned.
- Use the Description field to note the client’s industry focus, SIA licence type, or which compliance tier they are working towards. This context is helpful when multiple team members manage the platform.
Troubleshooting
- “Unable to create client” error — Ensure the client name is unique. Two clients cannot share the same name.
- Deploy button not appearing — Verify that template registers or template documents exist in the system. If no templates have been created yet, there is nothing to deploy.
- Client not appearing in the list — Check that you are not viewing the platform within a client context. Exit the client context using the banner at the top of the page to see all clients.
- Registers show 0 after deployment — Refresh the page. The count should update to reflect the newly deployed templates. If it still shows 0, check the deployment confirmation message for any errors.