Managing Users
Overview
Users are the individuals who access Fisher Portal. As a Super Admin, you have full visibility of every user account on the platform, regardless of which client organisation they belong to. You can create new user accounts, assign roles, manage client memberships, and view detailed user profiles.
Each user can belong to one or more client organisations through memberships. A membership connects a user to a client and defines their role within that organisation.
User Roles
Fisher Portal uses a tiered role system to control access:
| Role | Access Level | Description |
|---|---|---|
| Super Admin | Full platform | Unrestricted access to all clients, users, templates, and platform settings. Reserved for Fisher Security Consulting staff. |
| Admin | Client-scoped | Full access within their assigned client organisation(s). Can manage registers, documents, and users within their client. |
| User | Client-scoped | Standard access within their assigned client organisation(s). Can view and interact with registers and documents but has limited management capabilities. |
Roles are assigned at two levels:
- Account role — set on the user record itself (e.g. super_admin)
- Membership role — set on the membership linking a user to a specific client (e.g. client_admin)
Step-by-Step Guide
Step 1: View All Users
Navigate to the Staff Directory by accessing the users section. The directory provides an overview of all users on the platform.
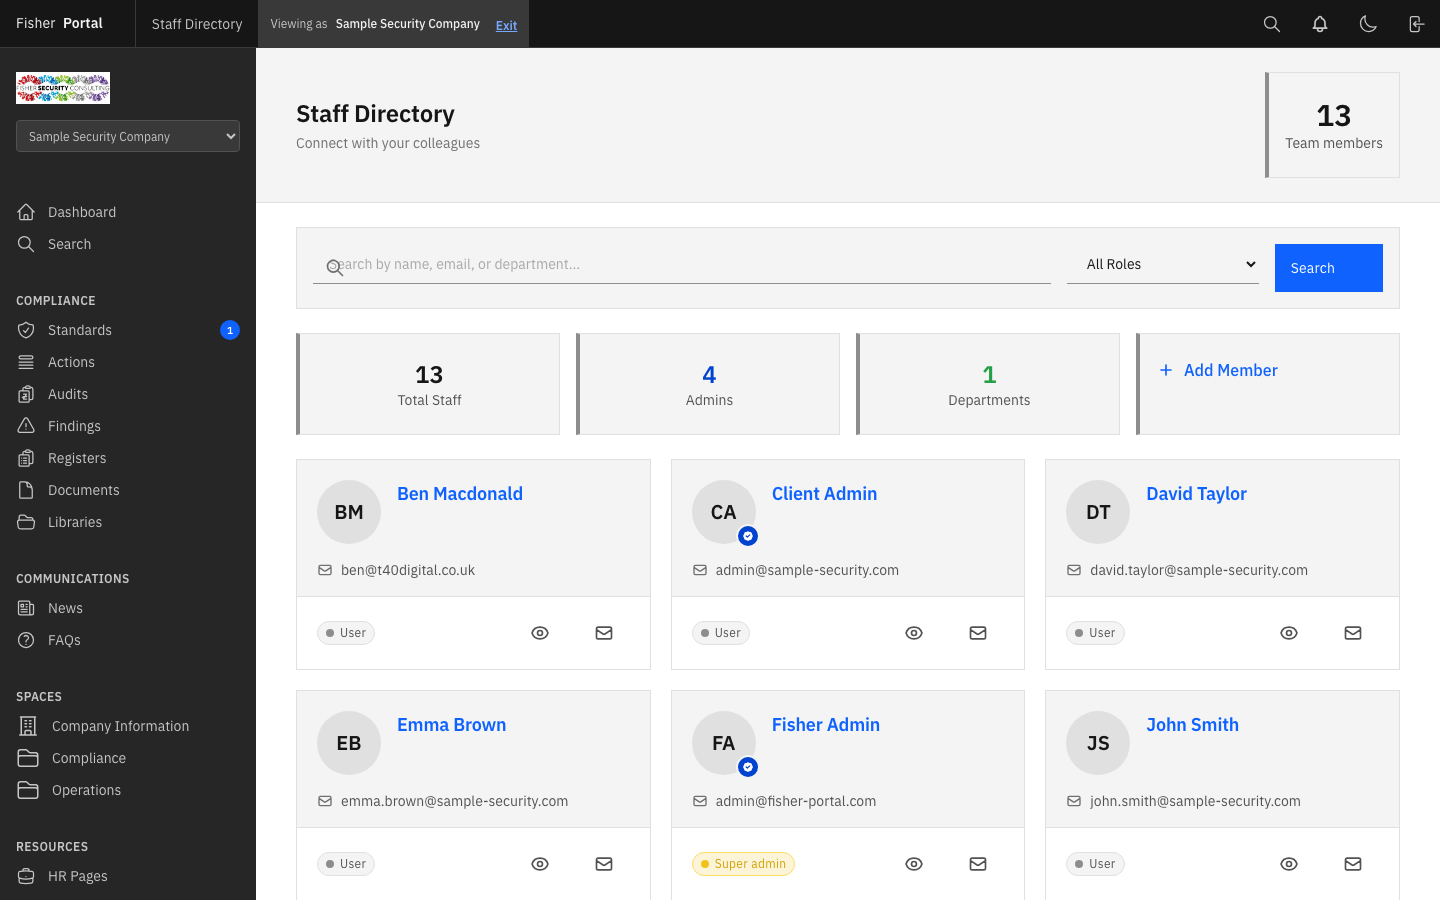
At the top of the page, summary cards display:
| Metric | Description |
|---|---|
| Total Staff | The total number of user accounts across the platform |
| Admins | The number of users with admin-level access |
| Departments | The number of distinct departments represented |
| + Add Member | Quick link to create a new user |
Each user is displayed as a card showing:
- Name and initials avatar
- Email address
- Role badge (User, Admin, or Super Admin)
- Quick action icons for viewing the profile, and sending an email
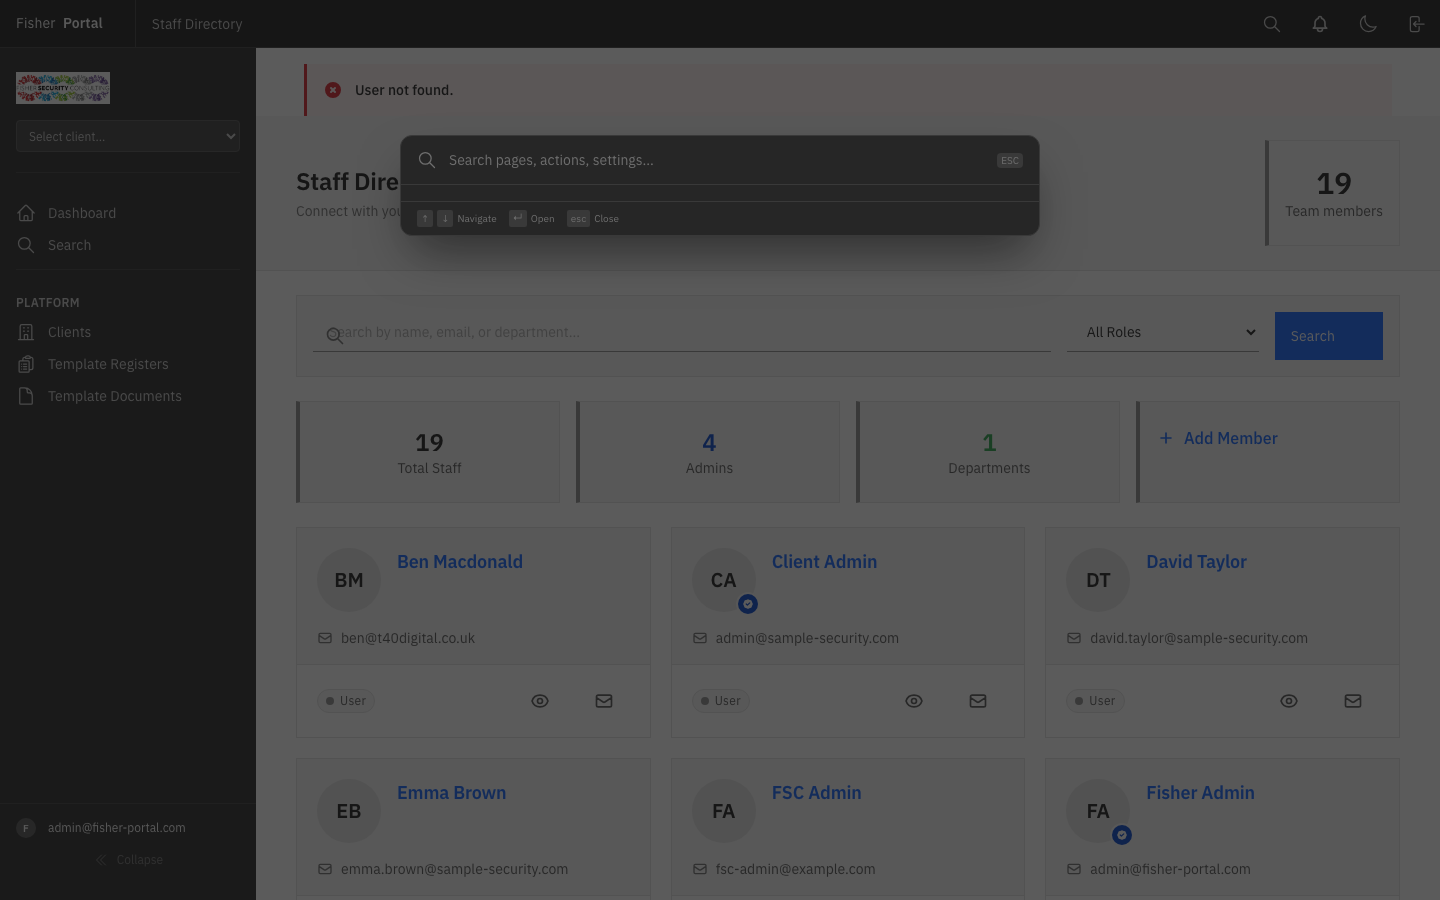
Step 2: Search and Filter Users
Use the search bar and role filter at the top of the Staff Directory to find specific users:
- Search — Type a name, email address, or department into the search field.
- Role filter — Use the dropdown to filter by “All Roles”, or select a specific role.
- Click Search to apply the filters.
Step 3: Create a New User
- Click the + Add Member card in the summary section, or navigate to the new user form.
- Complete the user form with the following details:
| Field | Required | Description |
|---|---|---|
| First name | Yes | The user’s first name |
| Last name | Yes | The user’s surname |
| Yes | Must be unique across the platform. This is their login credential. | |
| Password | Yes | Set an initial password for the user. They can change this later. |
| Role | Yes | Select Super Admin, Admin, or User |
| Department | No | The user’s department within their organisation |
| Phone | No | Contact telephone number |
- Click Create User to save the account.
- After creation, you can assign the user to one or more client organisations via memberships.
Step 4: View a User Profile
Click on a user’s name in the Staff Directory to open their full profile.
The profile page shows:
- Personal details — name, email, department, phone number
- Account information — role, account creation date, last sign-in
- Client memberships — which client organisations the user belongs to and their role within each
- Actions — options to edit, reset password, impersonate (if you are a Super Admin and it is not your own account), or send an email
Step 5: Assign a User to a Client
Users gain access to client data through memberships. To assign a user to a client organisation:
- Navigate to the user’s profile page.
- In the memberships section, add the user to the desired client organisation.
- Select their membership role (e.g. client_admin or user).
- Save the membership.
A user can hold memberships in multiple client organisations simultaneously, with different roles in each.
Step 6: Edit a User
- From the user’s profile page, click Edit.
- Update the user’s details, role, or department as needed.
- Click Update User to save changes.
Step 7: Reset a User’s Password
- Navigate to the user’s profile page.
- Click Reset Password.
- Enter a new password for the user.
- Click Update to save the new password.
The user will need to use the new password on their next login. Consider notifying them directly.
Tips
- Always use the user’s work email address as their account email. This ensures password reset emails reach the right person.
- When onboarding a new client, create the client organisation first, then create user accounts and assign memberships. This ensures users have something to access immediately.
- Use the Department field to help organise users within larger client organisations. This is particularly useful for security companies with multiple operational divisions.
- Super Admin accounts should be limited to Fisher Security Consulting staff only. Client personnel should never be given Super Admin access.
- If a user needs access to multiple client organisations (e.g. a regional manager overseeing several branches), create a single account and add multiple memberships rather than creating duplicate accounts.
Troubleshooting
- “Email has already been taken” error — Each email address must be unique across the entire platform. Check whether an account already exists for this person, or use a different email address.
- User cannot see a client’s data — Verify that the user has an active membership for that client organisation. Navigate to their profile and check the memberships section.
- User appears in the directory but cannot log in — Check that their account has not been soft-deleted. If it has, the account will need to be restored by a Super Admin.
- Role badge shows “User” but they should be an Admin — Roles can be set at the account level and the membership level. Ensure both are correct for the user’s needs.
- Cannot find a user in the directory — Try clearing your search filters and role selection. If the user still does not appear, they may not have been created yet or their account may have been deleted.