
Managing Standards and Clauses
The standards area is the centre of Fisher Portal’s compliance management workflow. It is used by FSC Staff and Super Admins to define what is in scope for a client and to maintain the position of every clause.
This can include ISO standards such as ISO 9001 and ISO 14001, as well as relevant British Standards and SIA codes. The exact list depends on the standards available in the platform and the client’s agreed scope.
How the Records Fit Together
| Record | Purpose |
|---|---|
| Standard | The ISO, British Standard, SIA code or other requirement in scope |
| Clause | One requirement within the standard |
| Clause status | The client’s current implementation, RAG position, comments and review date |
| Evidence | A portal document or approved external source that supports a clause |
| Audit | A planned or completed formal review |
| Finding | A non-conformance, observation or improvement opportunity recorded during an audit |
| Action | Corrective or improvement work with an owner, due date and status |
Step 1: Open the Correct Client
- Open the platform dashboard or Clients.
- Choose the organisation you are reviewing.
- Confirm the client name on the destination page.
- Open Compliance Standards.
If you work across several clients, always check the client name again before enabling a standard or changing a clause.
Step 2: Review Enabled Standards
The standards screen is split into two areas:
- Enabled standards shows the requirements already in scope.
- Enable a standard lists requirements that can still be added.
The page also links directly to the evidence register, action plan and audits.
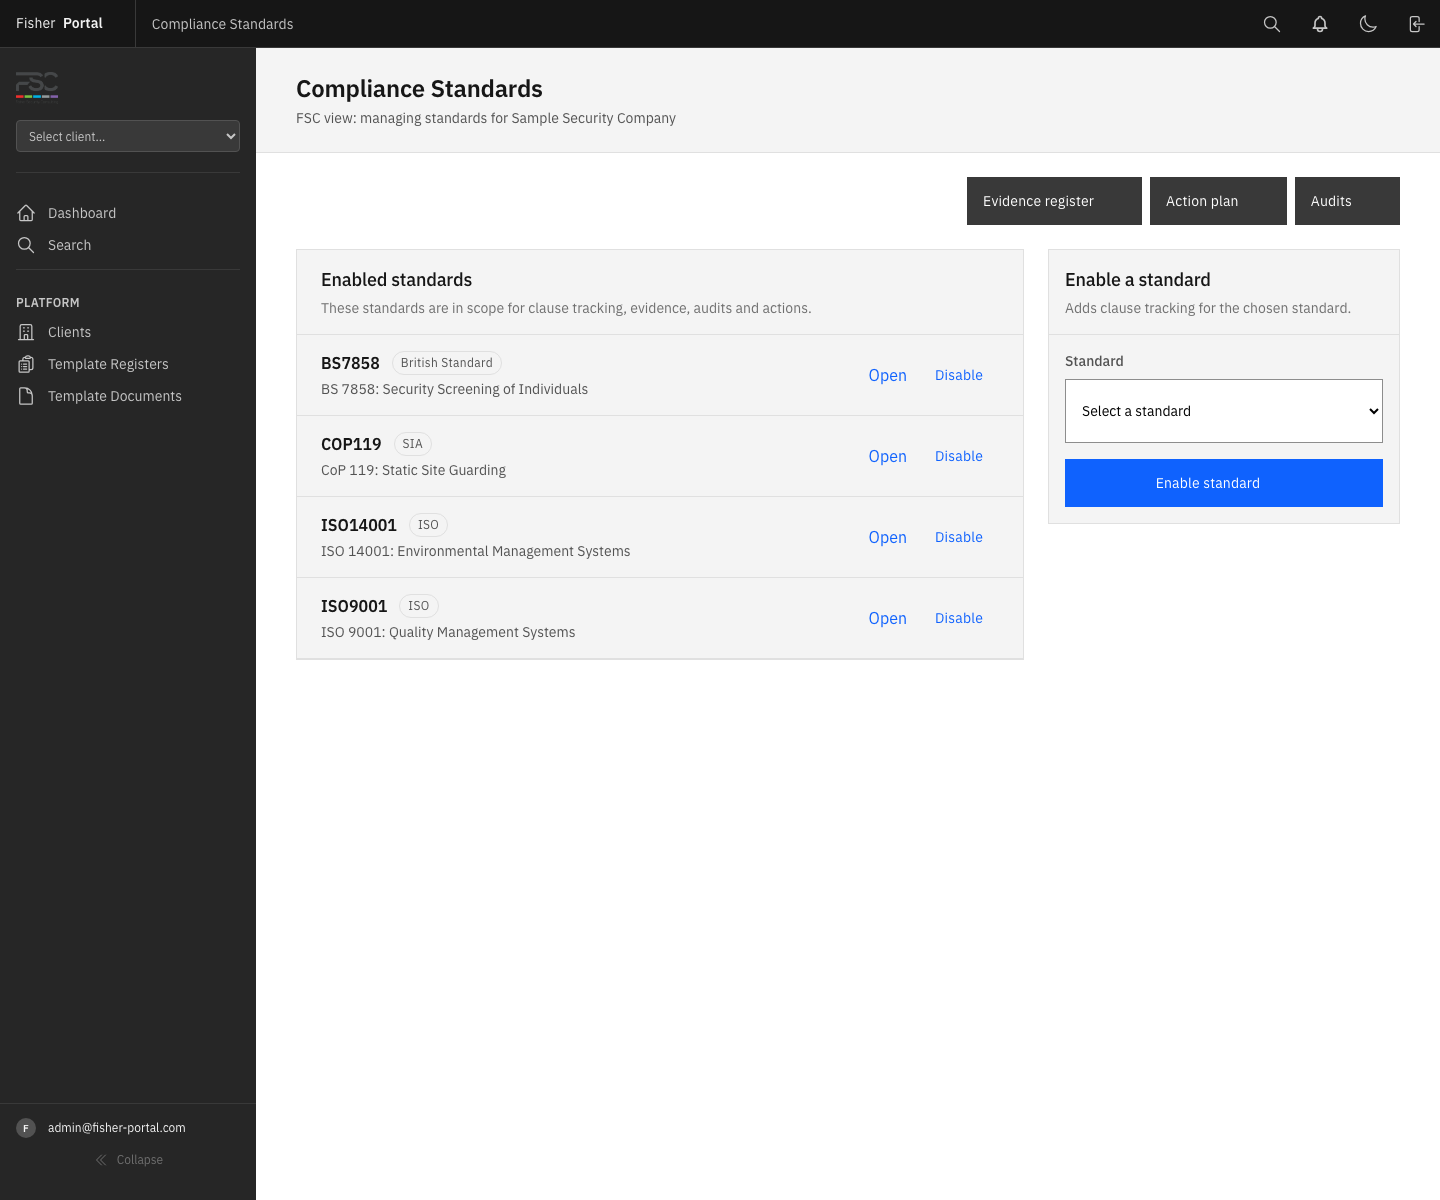
For an enabled standard, the summary can also show certification information when it is present, including status, certification body and relevant dates.
Step 3: Enable a Standard
- In Enable a standard, open the Standard list.
- Select the required standard.
- Select Enable standard.
- Wait for the confirmation message.
- Confirm that the standard now appears under Enabled standards.
Enabling a standard creates the clause-tracking structure for that client. Do this only when the standard is part of the agreed scope.
Step 4: Open the Clause Tracker
- Find the standard under Enabled standards.
- Select Open.
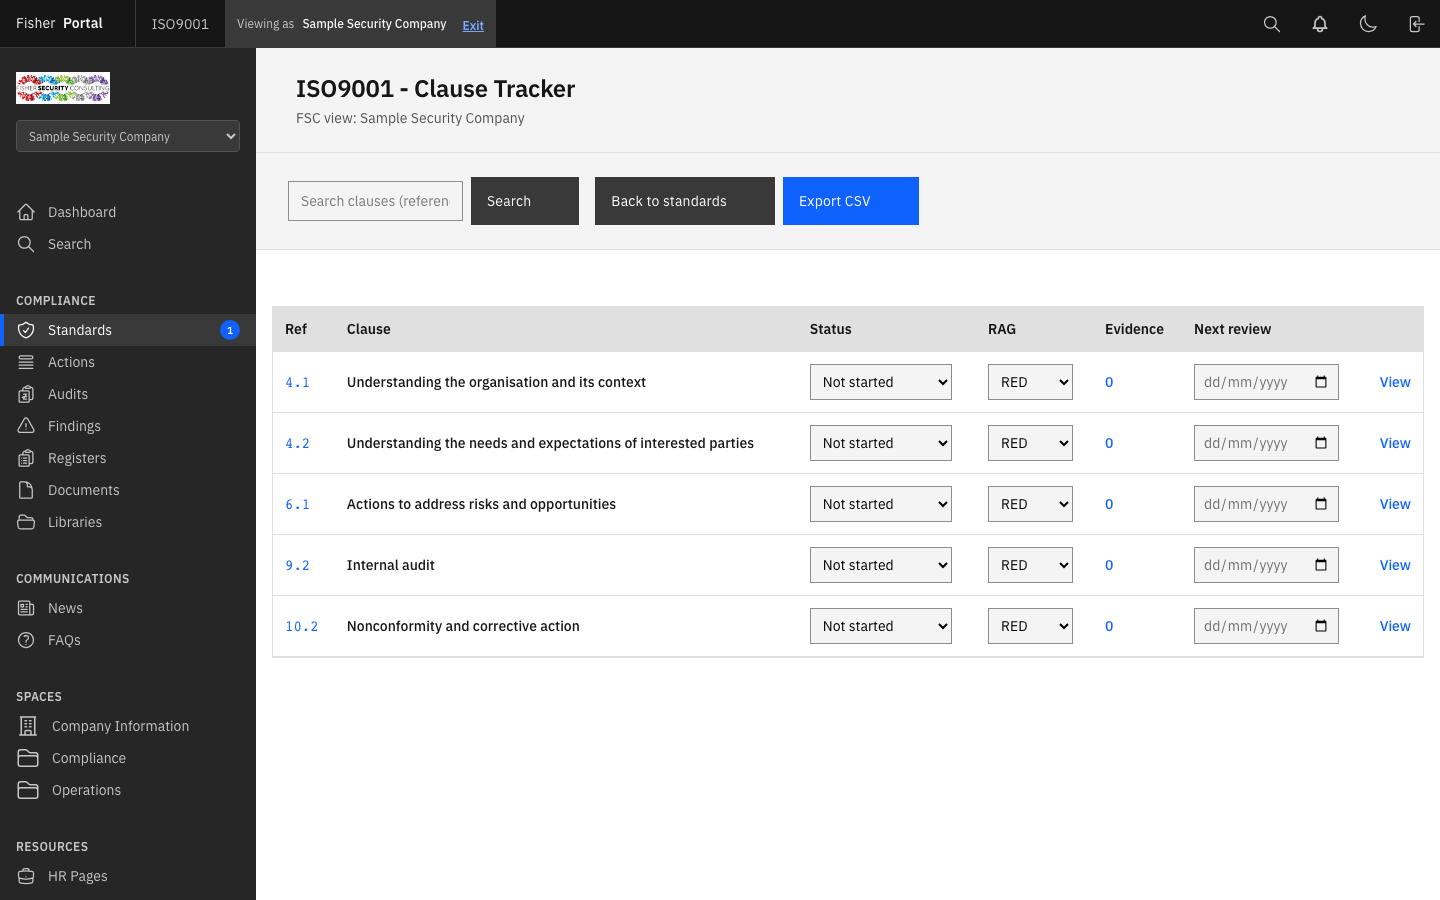
- Review the clause reference, title, implementation status, RAG position, evidence count and next review date.
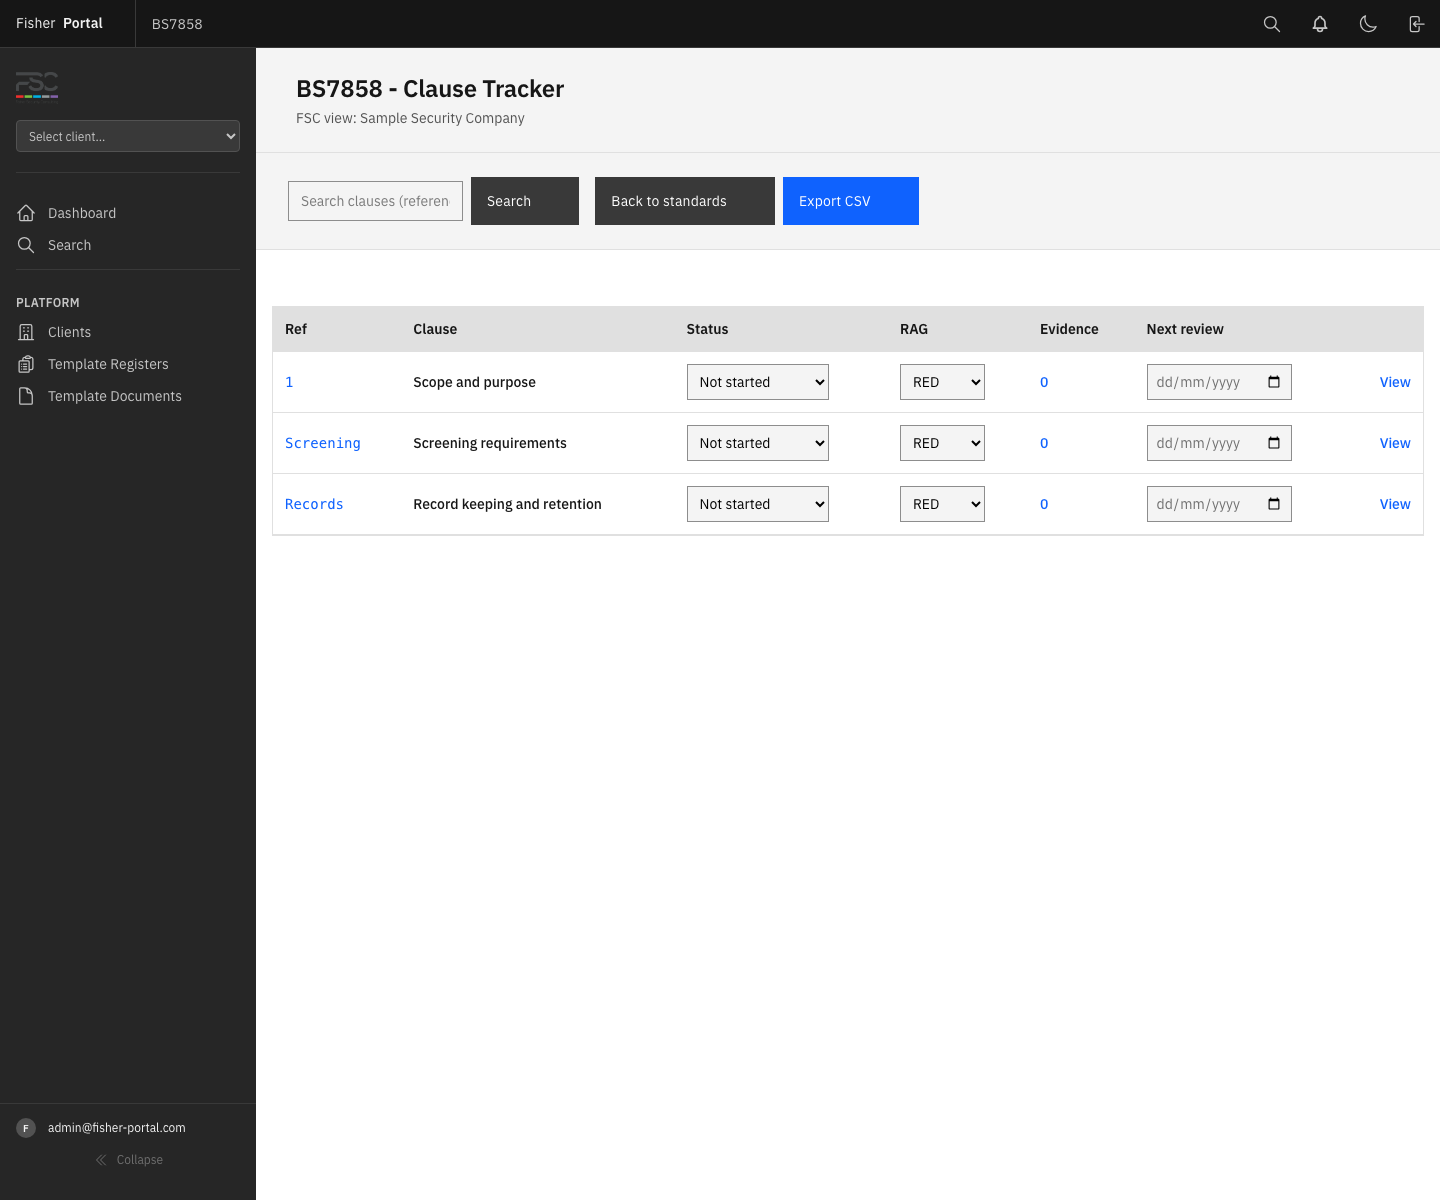
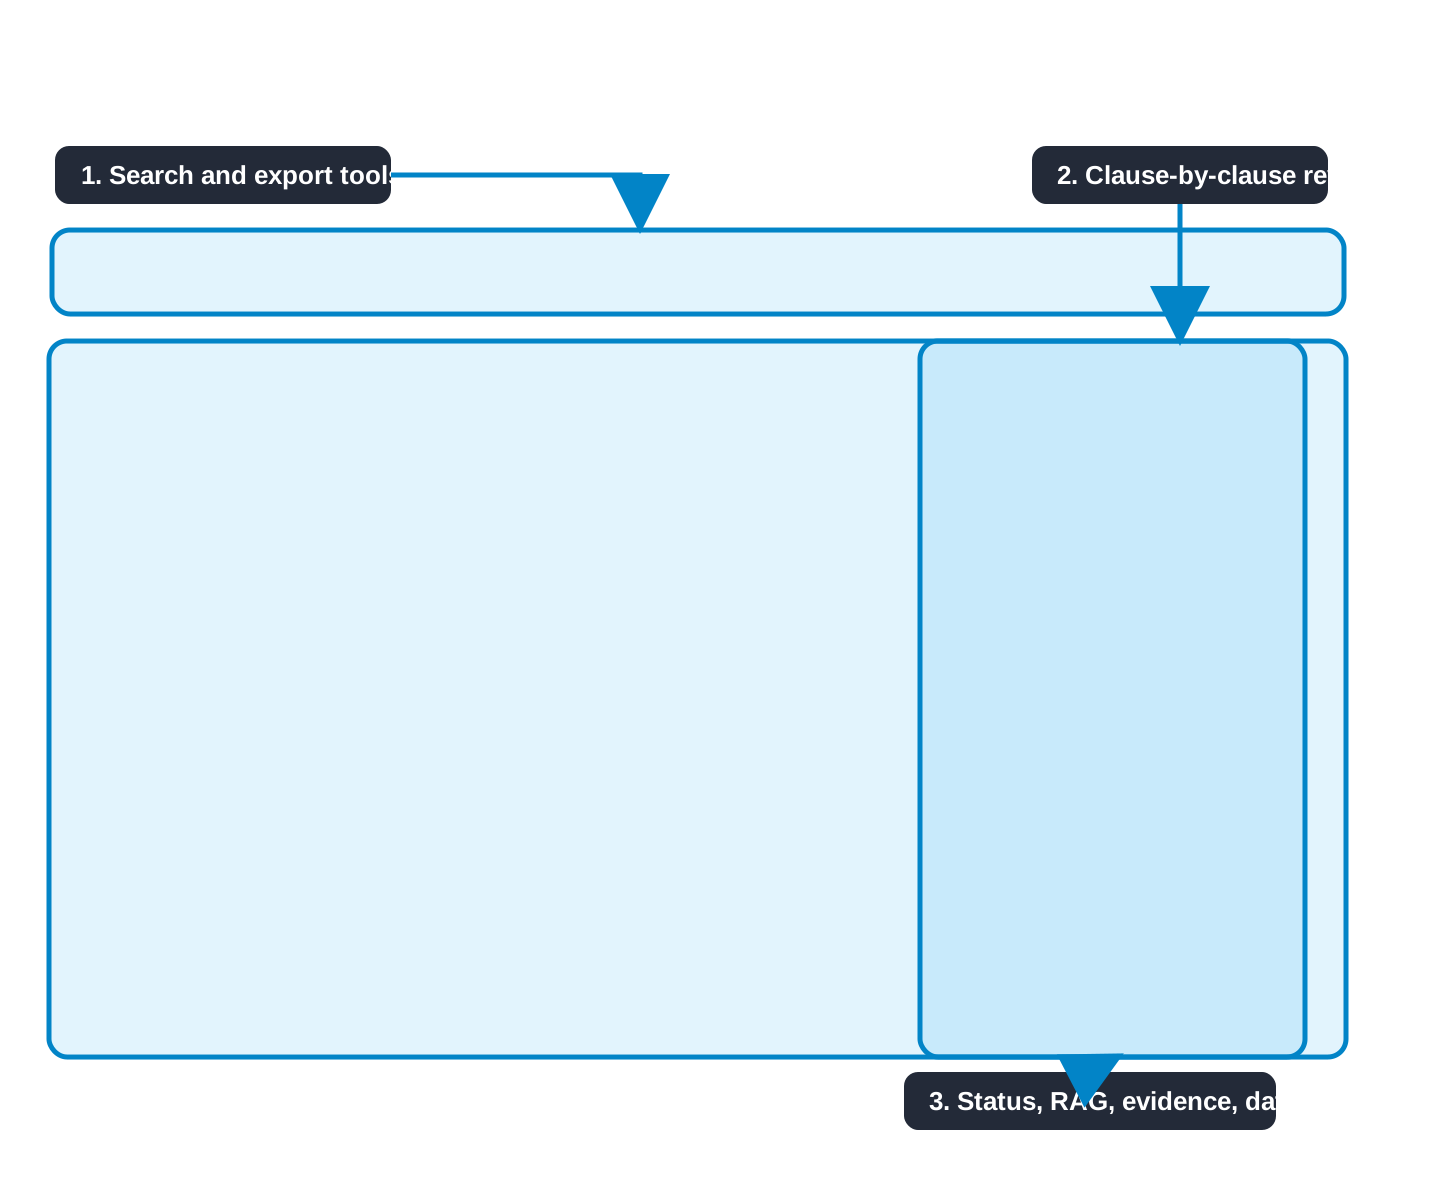
The annotated view below highlights the main working controls.
Step 5: Search for a Clause
- Enter a clause reference, title or requirement word in Search clauses.
- Select Search.
- Review the filtered list.
- Clear the search to return to every clause.
The export follows the visible search. If you want a full standard report, clear the search before exporting.
Step 6: Update Implementation Status
Use the Status list on the clause row or open the full clause detail page.
Available labels can include:
| Status | Use it when |
|---|---|
| Not started | Work has not begun |
| In progress | Work is actively under way |
| Partially in place | Some controls or evidence exist, but the clause is not complete |
| In place or Implemented | The required control is operating and supported by evidence |
| Non-conforming | The current position does not meet the requirement |
Choose the label that best describes the current evidence. Do not mark a clause complete only because a document exists; confirm that the process is in use.
Step 7: Set the RAG Position
RAG is a quick risk and attention signal:
- Green — the position is satisfactory and supported.
- Amber — work or evidence is incomplete and needs attention.
- Red — a significant gap or non-conformance requires action.
Update the RAG value separately from implementation status. A clause may be in progress but still amber, or appear implemented while overdue evidence makes the position unsuitable for green.
Step 8: Set the Next Review Date
- Use Next review on the clause row, or open the clause detail page.
- Choose the next planned review date.
- Save the change if you are on the detail page.
- Confirm that the date appears in the tracker.
Past review dates are highlighted as overdue and can feed the readiness backlog.
Step 9: Open the Full Clause Record
Select View on a clause to open its complete record. This page brings together:
- the requirement summary;
- implementation status and RAG;
- next review date and comments;
- linked evidence;
- open compliance actions.
Use the comments field to record the short rationale for the current position. Keep it factual and include the next expected step when the clause is not complete.
Step 10: Add Evidence
- From the clause record, select Add evidence.
- Confirm the standard and clause.
- Enter a clear evidence title.
- Choose the evidence type.
- Select a portal library document or enter an approved external link.
- Add useful notes and the last verified date.
- Save the evidence link.
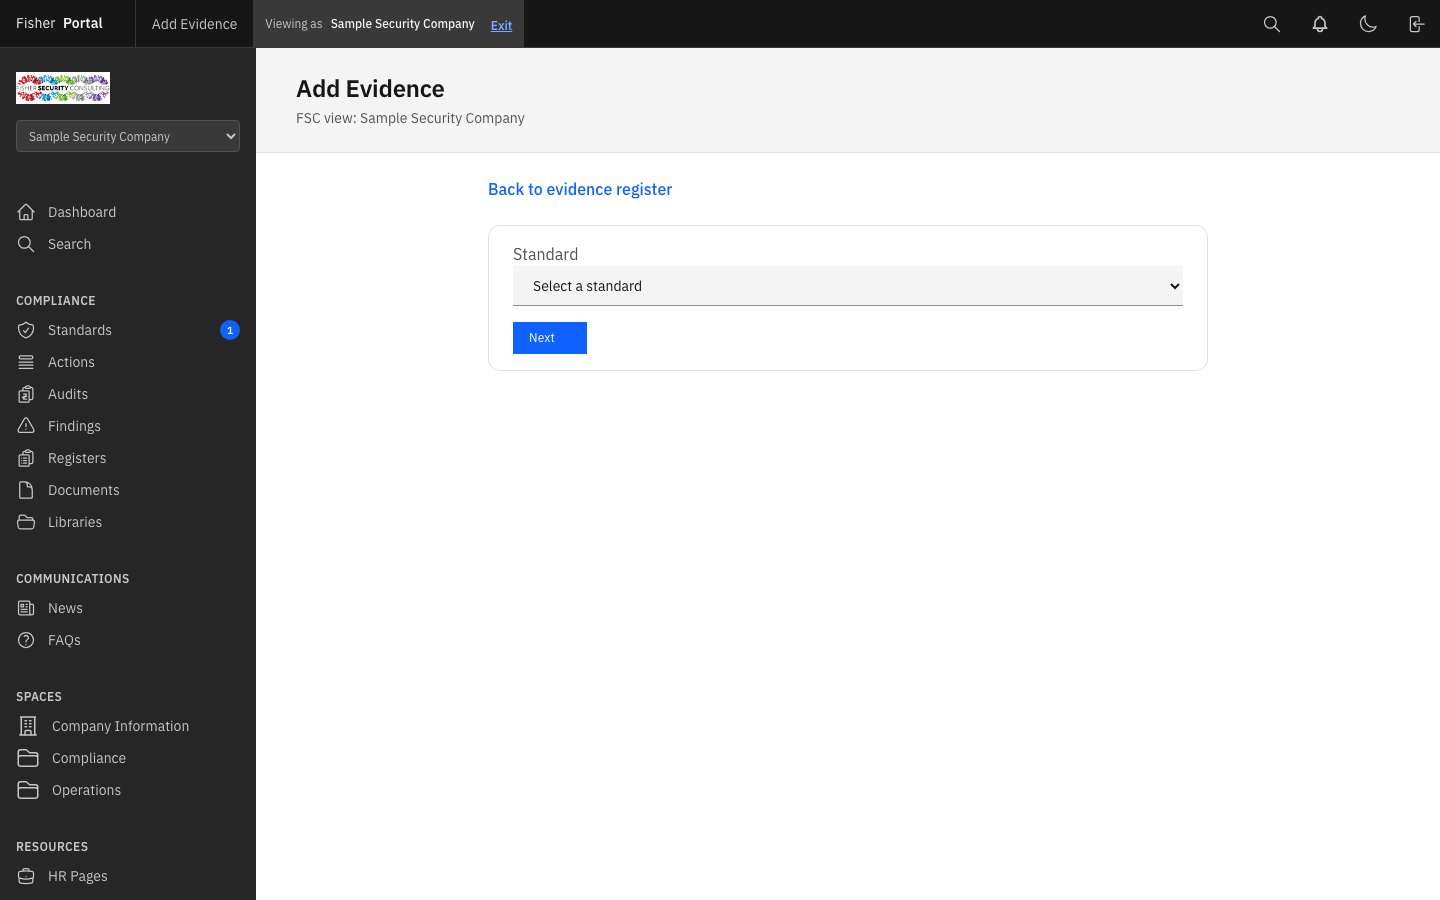
Evidence without a verification date, or evidence that has not been checked within the expected period, can be shown as needing review.
See the complete evidence guide →
Step 11: Create a Compliance Action
Use Add action on the clause when work is needed.
- Enter a short action title and clear description.
- Confirm the standard and clause.
- Set the severity, owner name, due date and current status.
- Save the action.
- Update it as work progresses.
- Select Done when the work and evidence are complete.
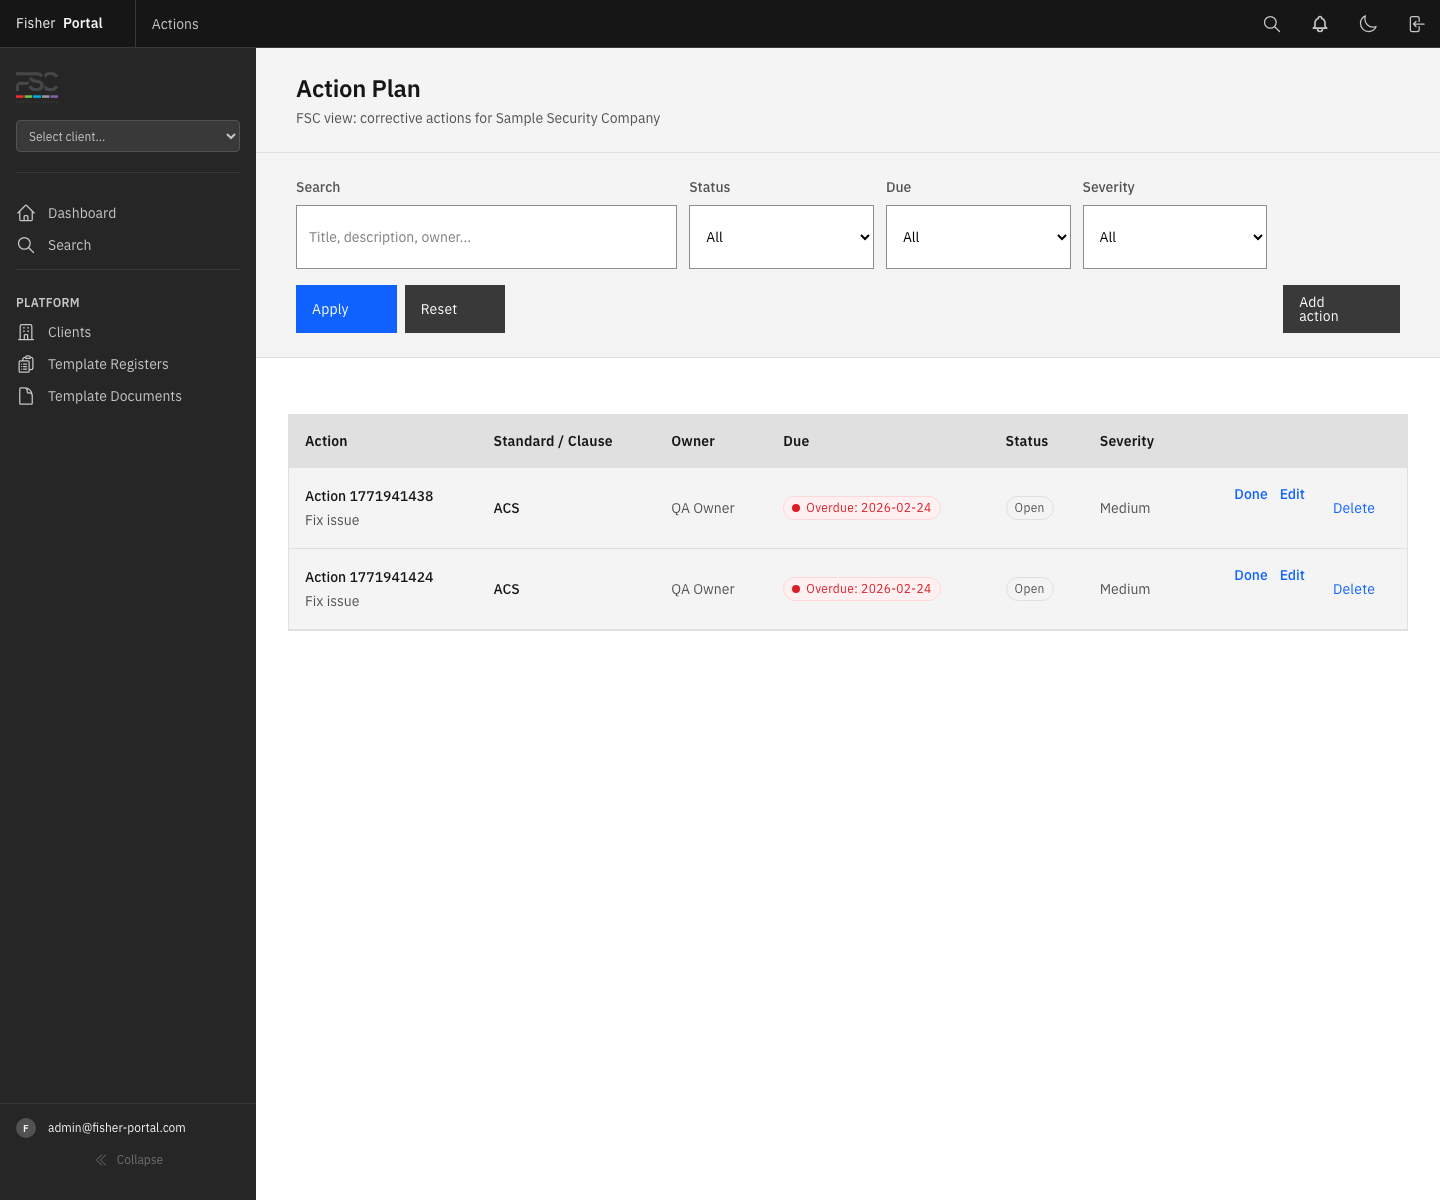
See the complete action guide →
Step 12: Link the Position to an Audit
Audits provide the formal review route. Create an internal, external or supplier audit, set its planned or performed date, and record findings against the relevant standard or clause.
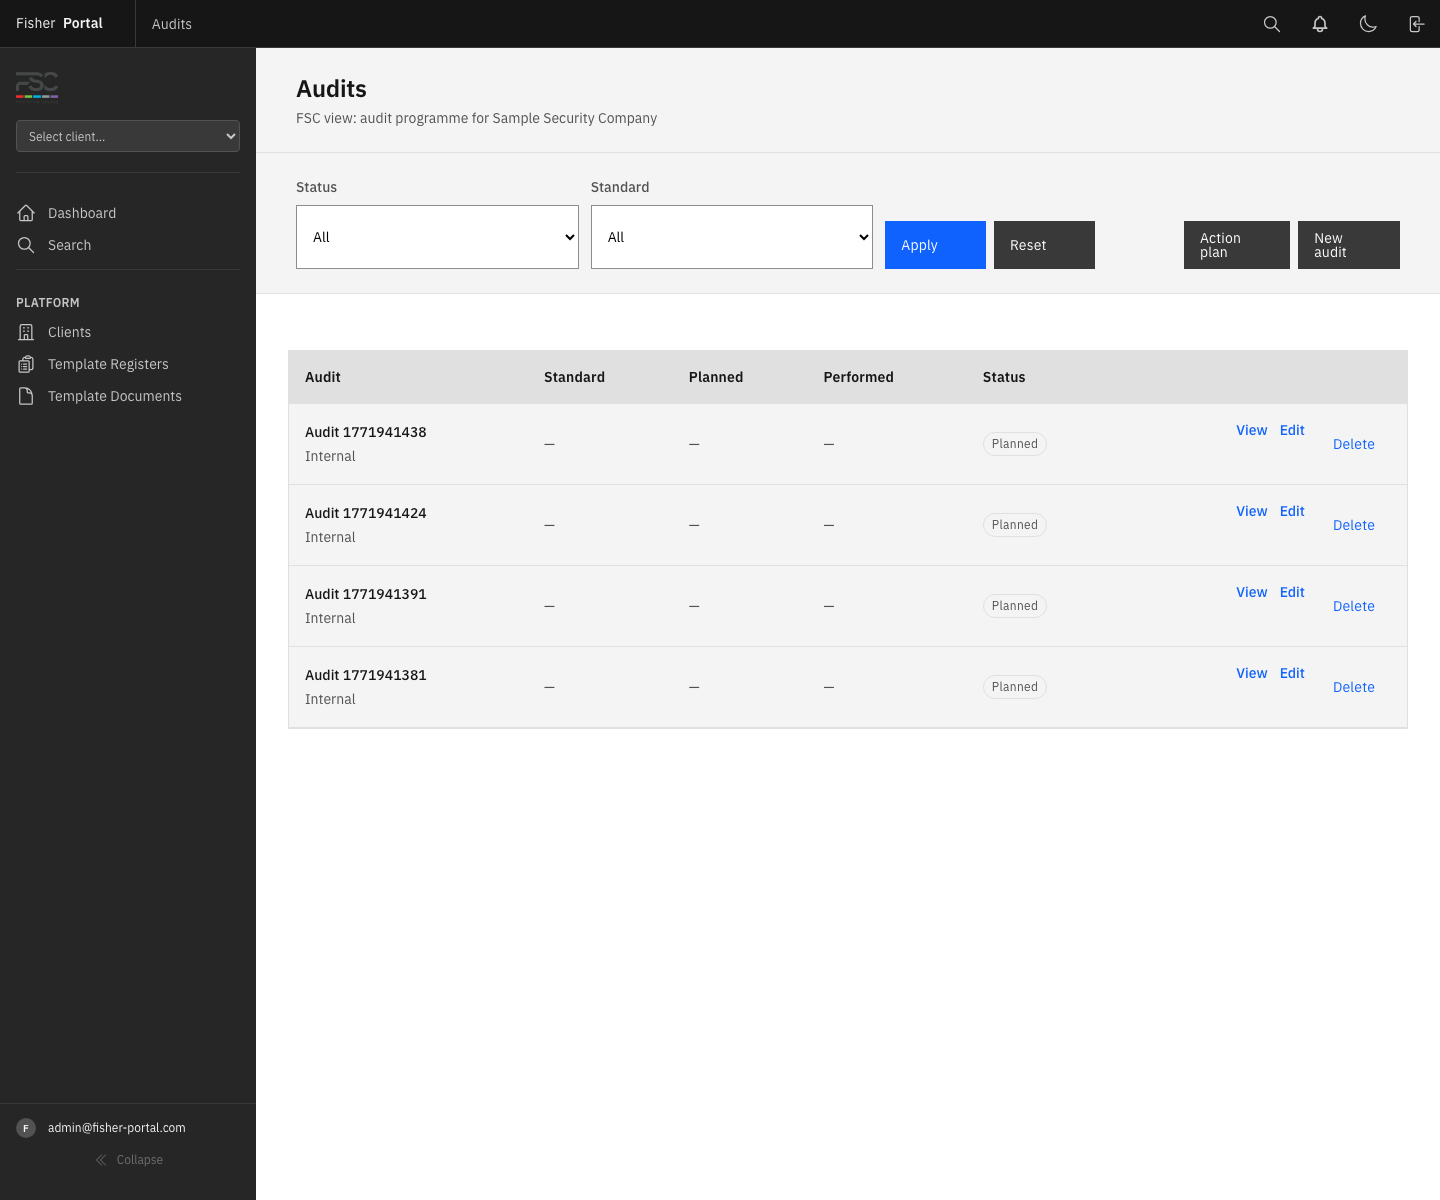
See the complete audit and finding guide →
Step 13: Export Clause Status
- Open the required standard.
- Clear the clause search if you need the complete standard.
- Select Export CSV.
- Open the downloaded file.
- Check the standard, client and date before sharing it.
The export includes the clause reference and title, implementation status, RAG position, review dates, reviewer and comments.
Step 14: Disable a Standard
Only disable a standard when it is no longer in the client’s agreed scope.
- Return to Compliance Standards.
- Find the standard under Enabled standards.
- Select Disable.
- Read the confirmation message carefully.
- Confirm the action.
Disabling removes the standard from normal active tracking. Check linked audits, actions and evidence first so that important follow-up work is not overlooked.
Recommended Review Routine
- Check the readiness dashboard for overdue reviews and actions.
- Open the relevant standard.
- Reassess the oldest or highest-risk clause.
- Verify the evidence.
- Update status, RAG, comments and next review date.
- Add an action for any remaining gap.
- Export the current position when a review pack is needed.
Troubleshooting
| Problem | What to do |
|---|---|
| Compliance Standards is not visible | Confirm that your account is FSC Staff or Super Admin and that you can access the client. |
| A standard is missing from the enable list | It may already be enabled or may not yet exist in the platform catalogue. |
| A clause search returns nothing | Clear the search and try the clause reference or a shorter requirement phrase. |
| An evidence count is zero | Open the clause and add a portal document or approved external source. |
| A review remains overdue | Save a new next review date after completing the assessment. |
| Export contains only a few clauses | Clear the clause search before selecting Export CSV. |